A custom flutter App Linked with Wordpress Rest API, with this
Project you can convert easily your wp website in too an app with
a lot of customization like (Colors, Animations, title...etc).
Also if you are planning to start your own news or blog site and
you don’t have any mobile and web development knowledge, this is
the solution for you. We will guide you to build your app.
This document covers the installation and use of this app from A
to Z, read this document thoroughly if you are experiencing any
difficulties. If you have any questions that are beyond the scope
of this document, please contact us we happy to answer them.
Features
List of features included in WP Template
● Push Notifications
● Admob Integration
● Search posts
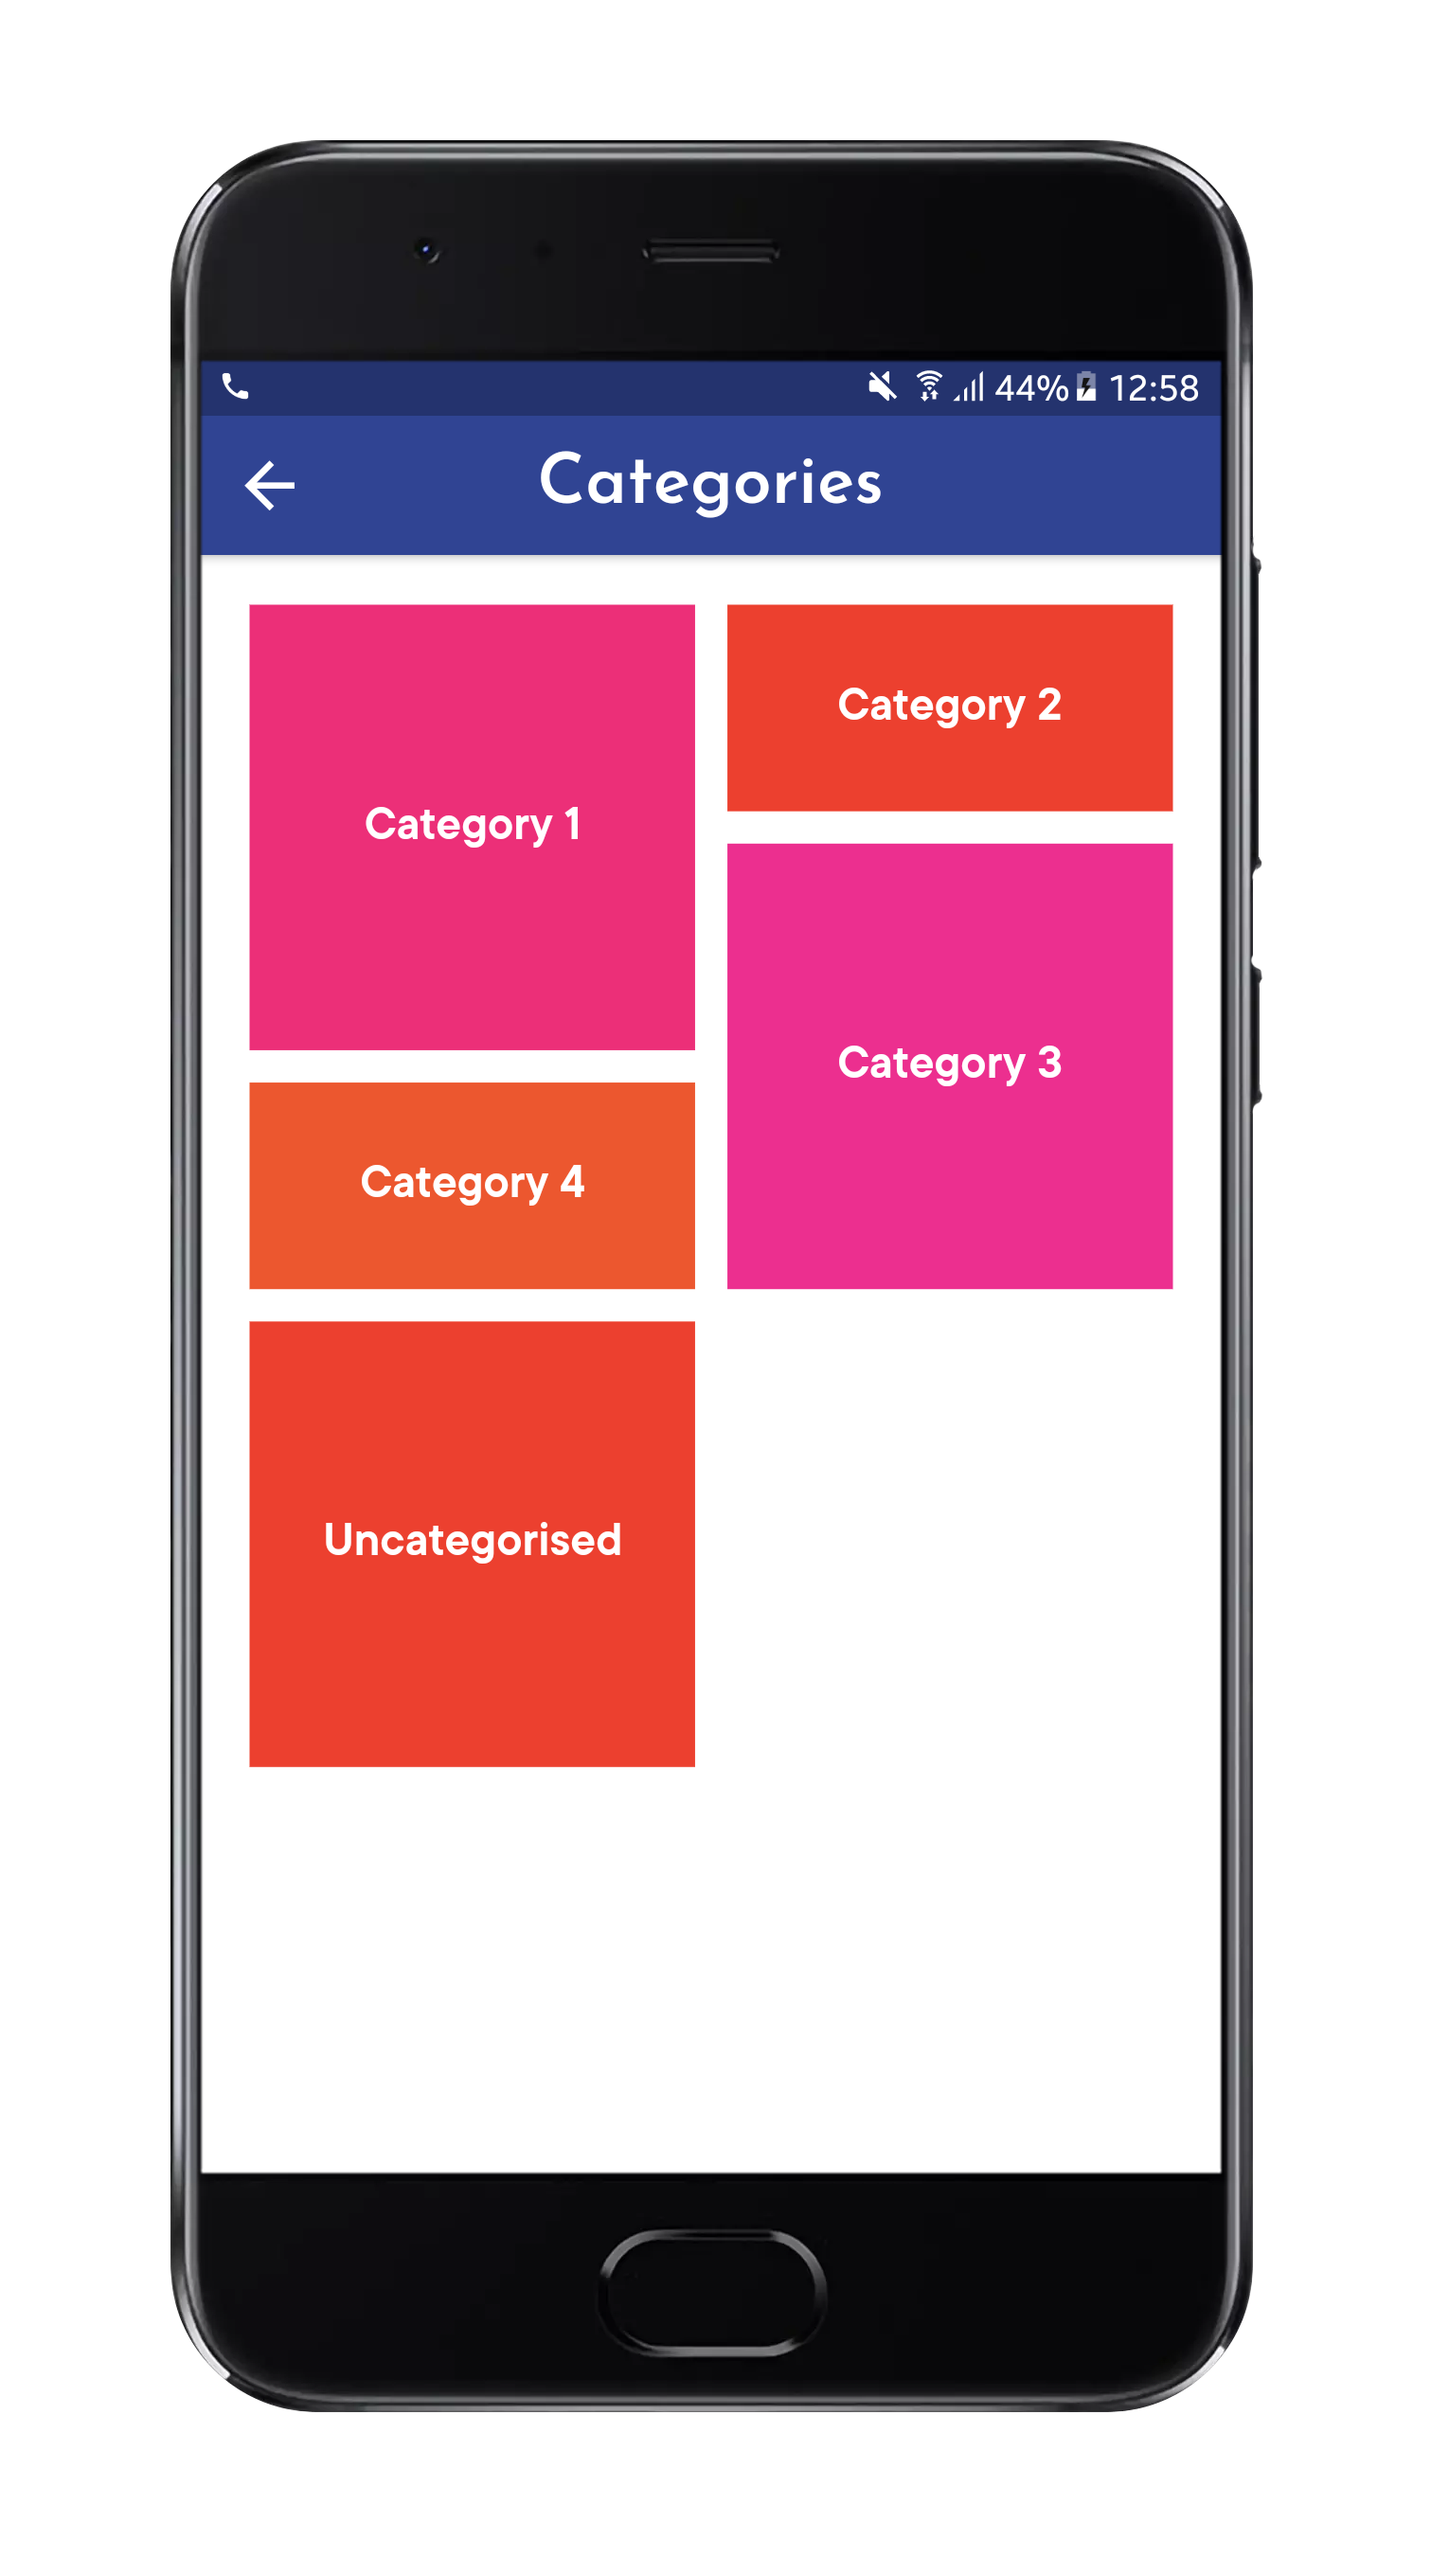
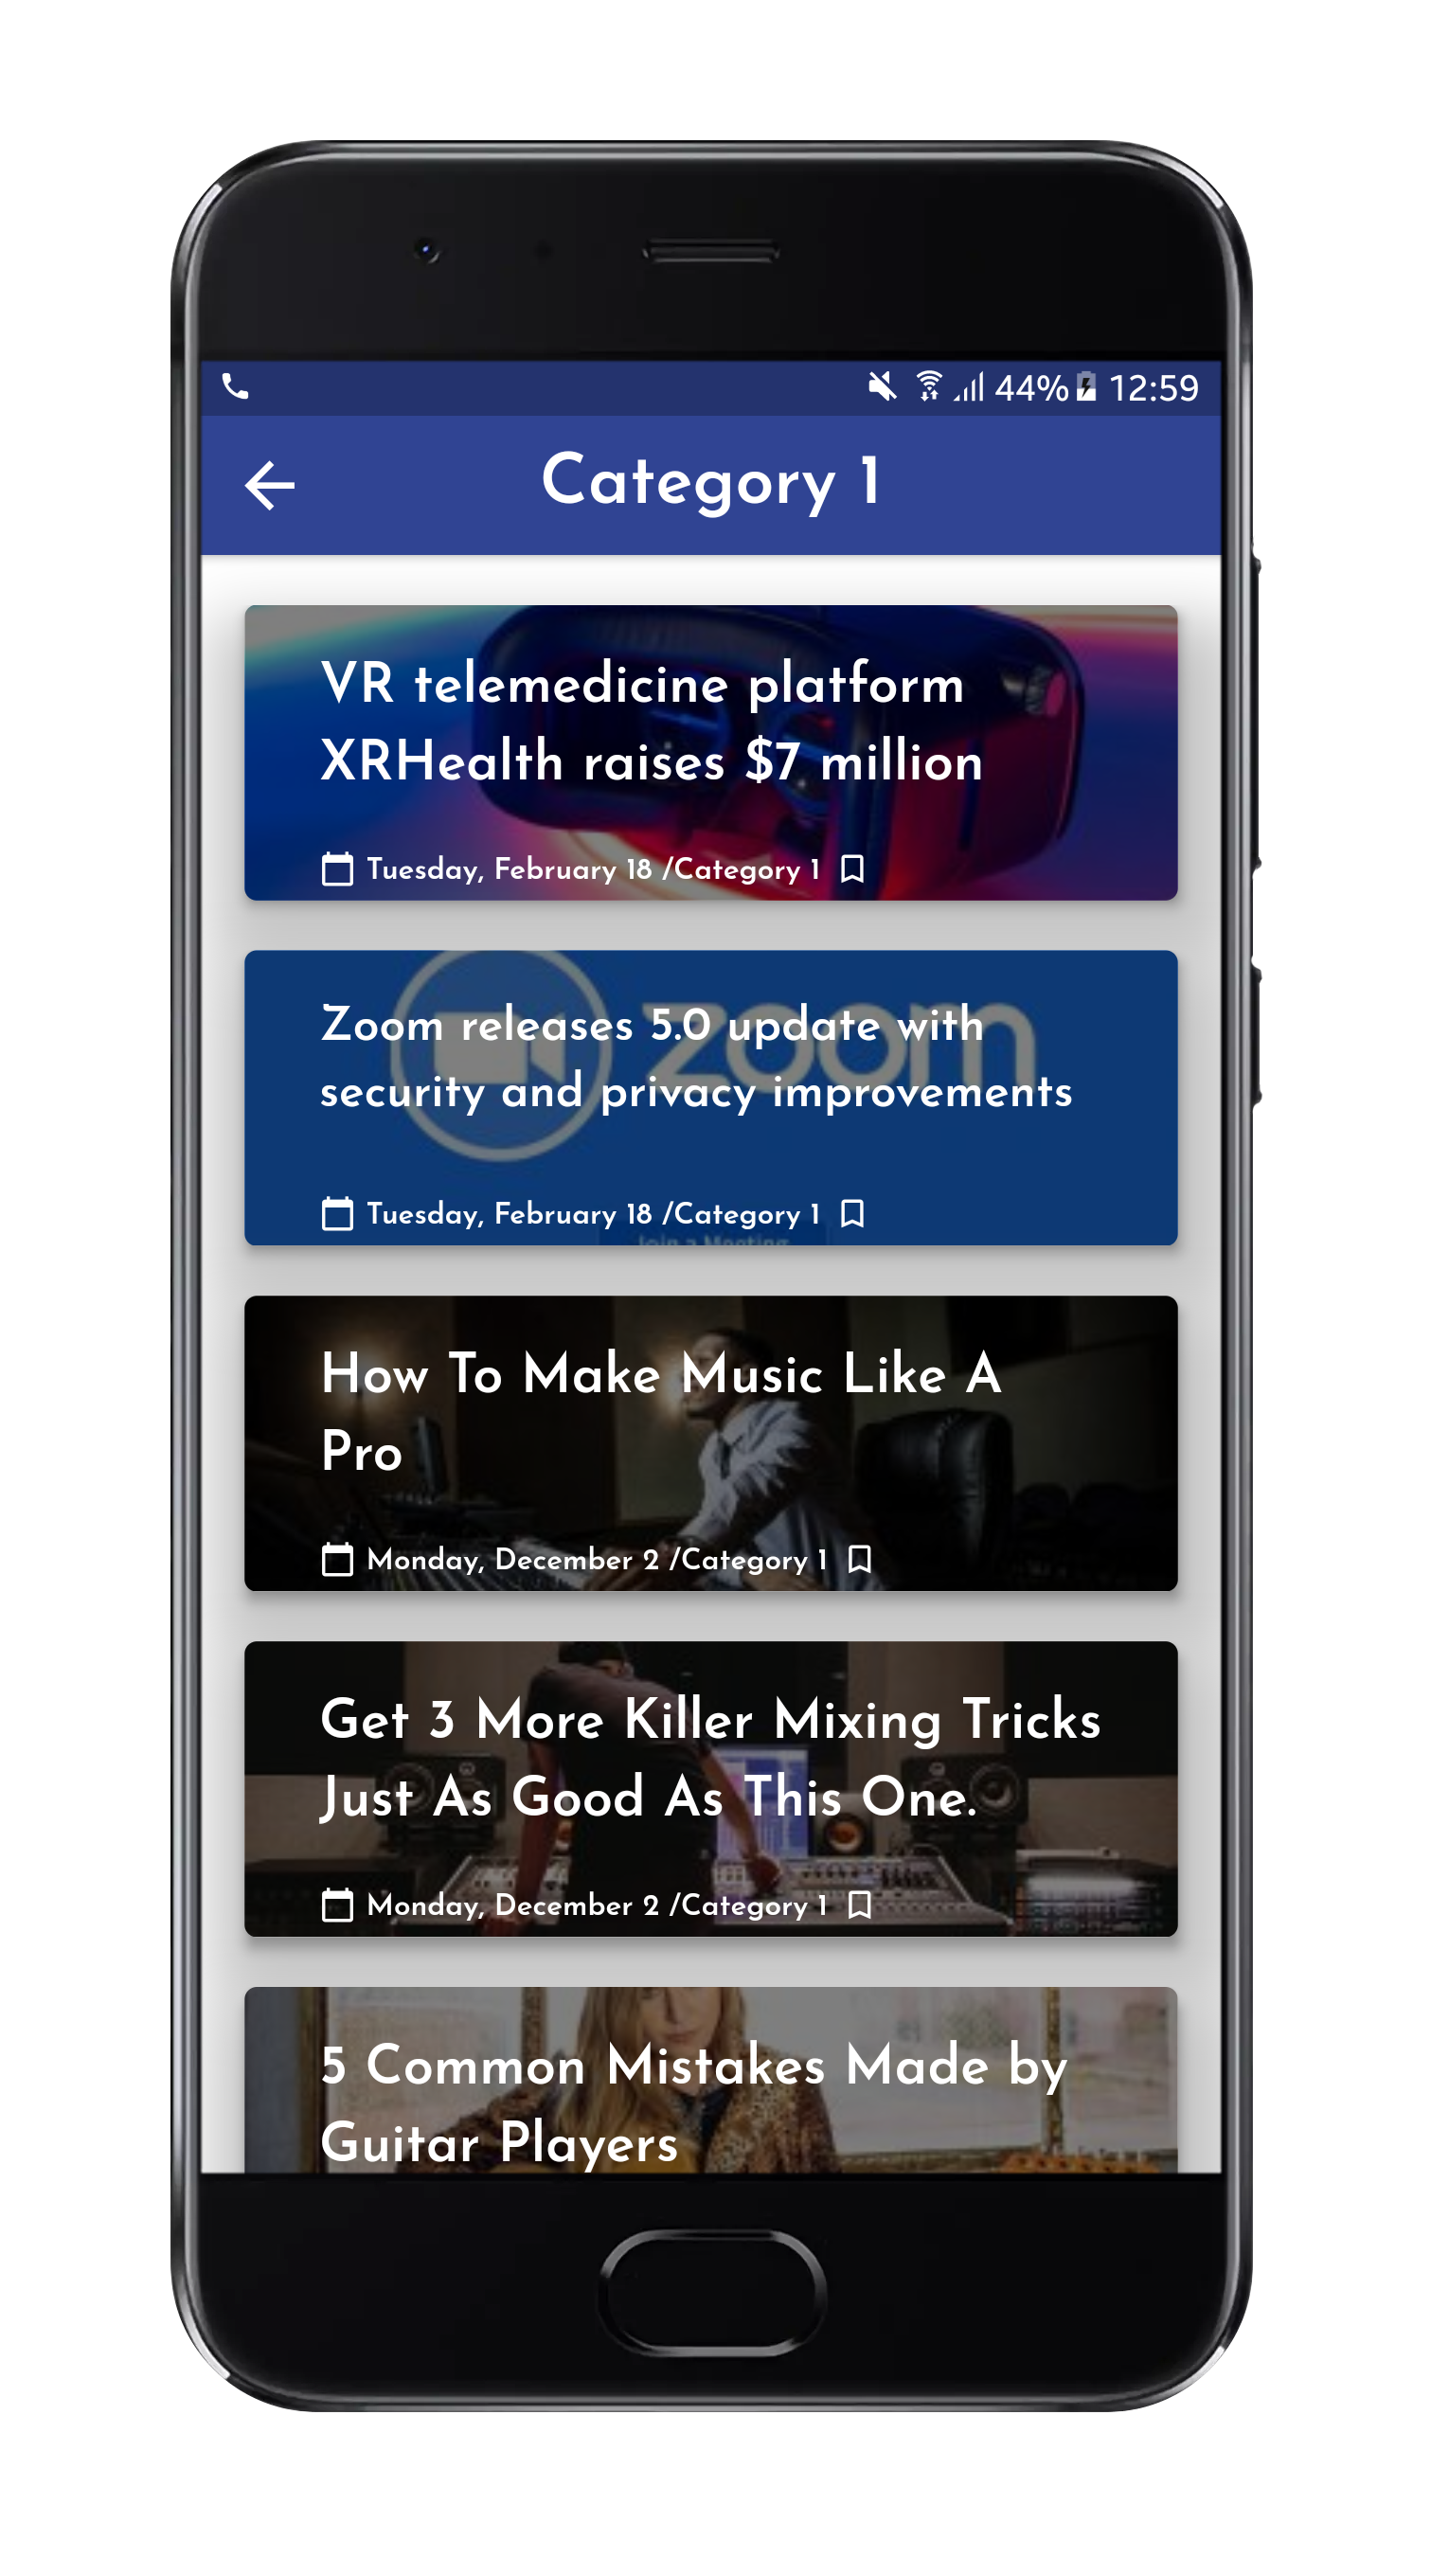
● Category listing
● Latest posts
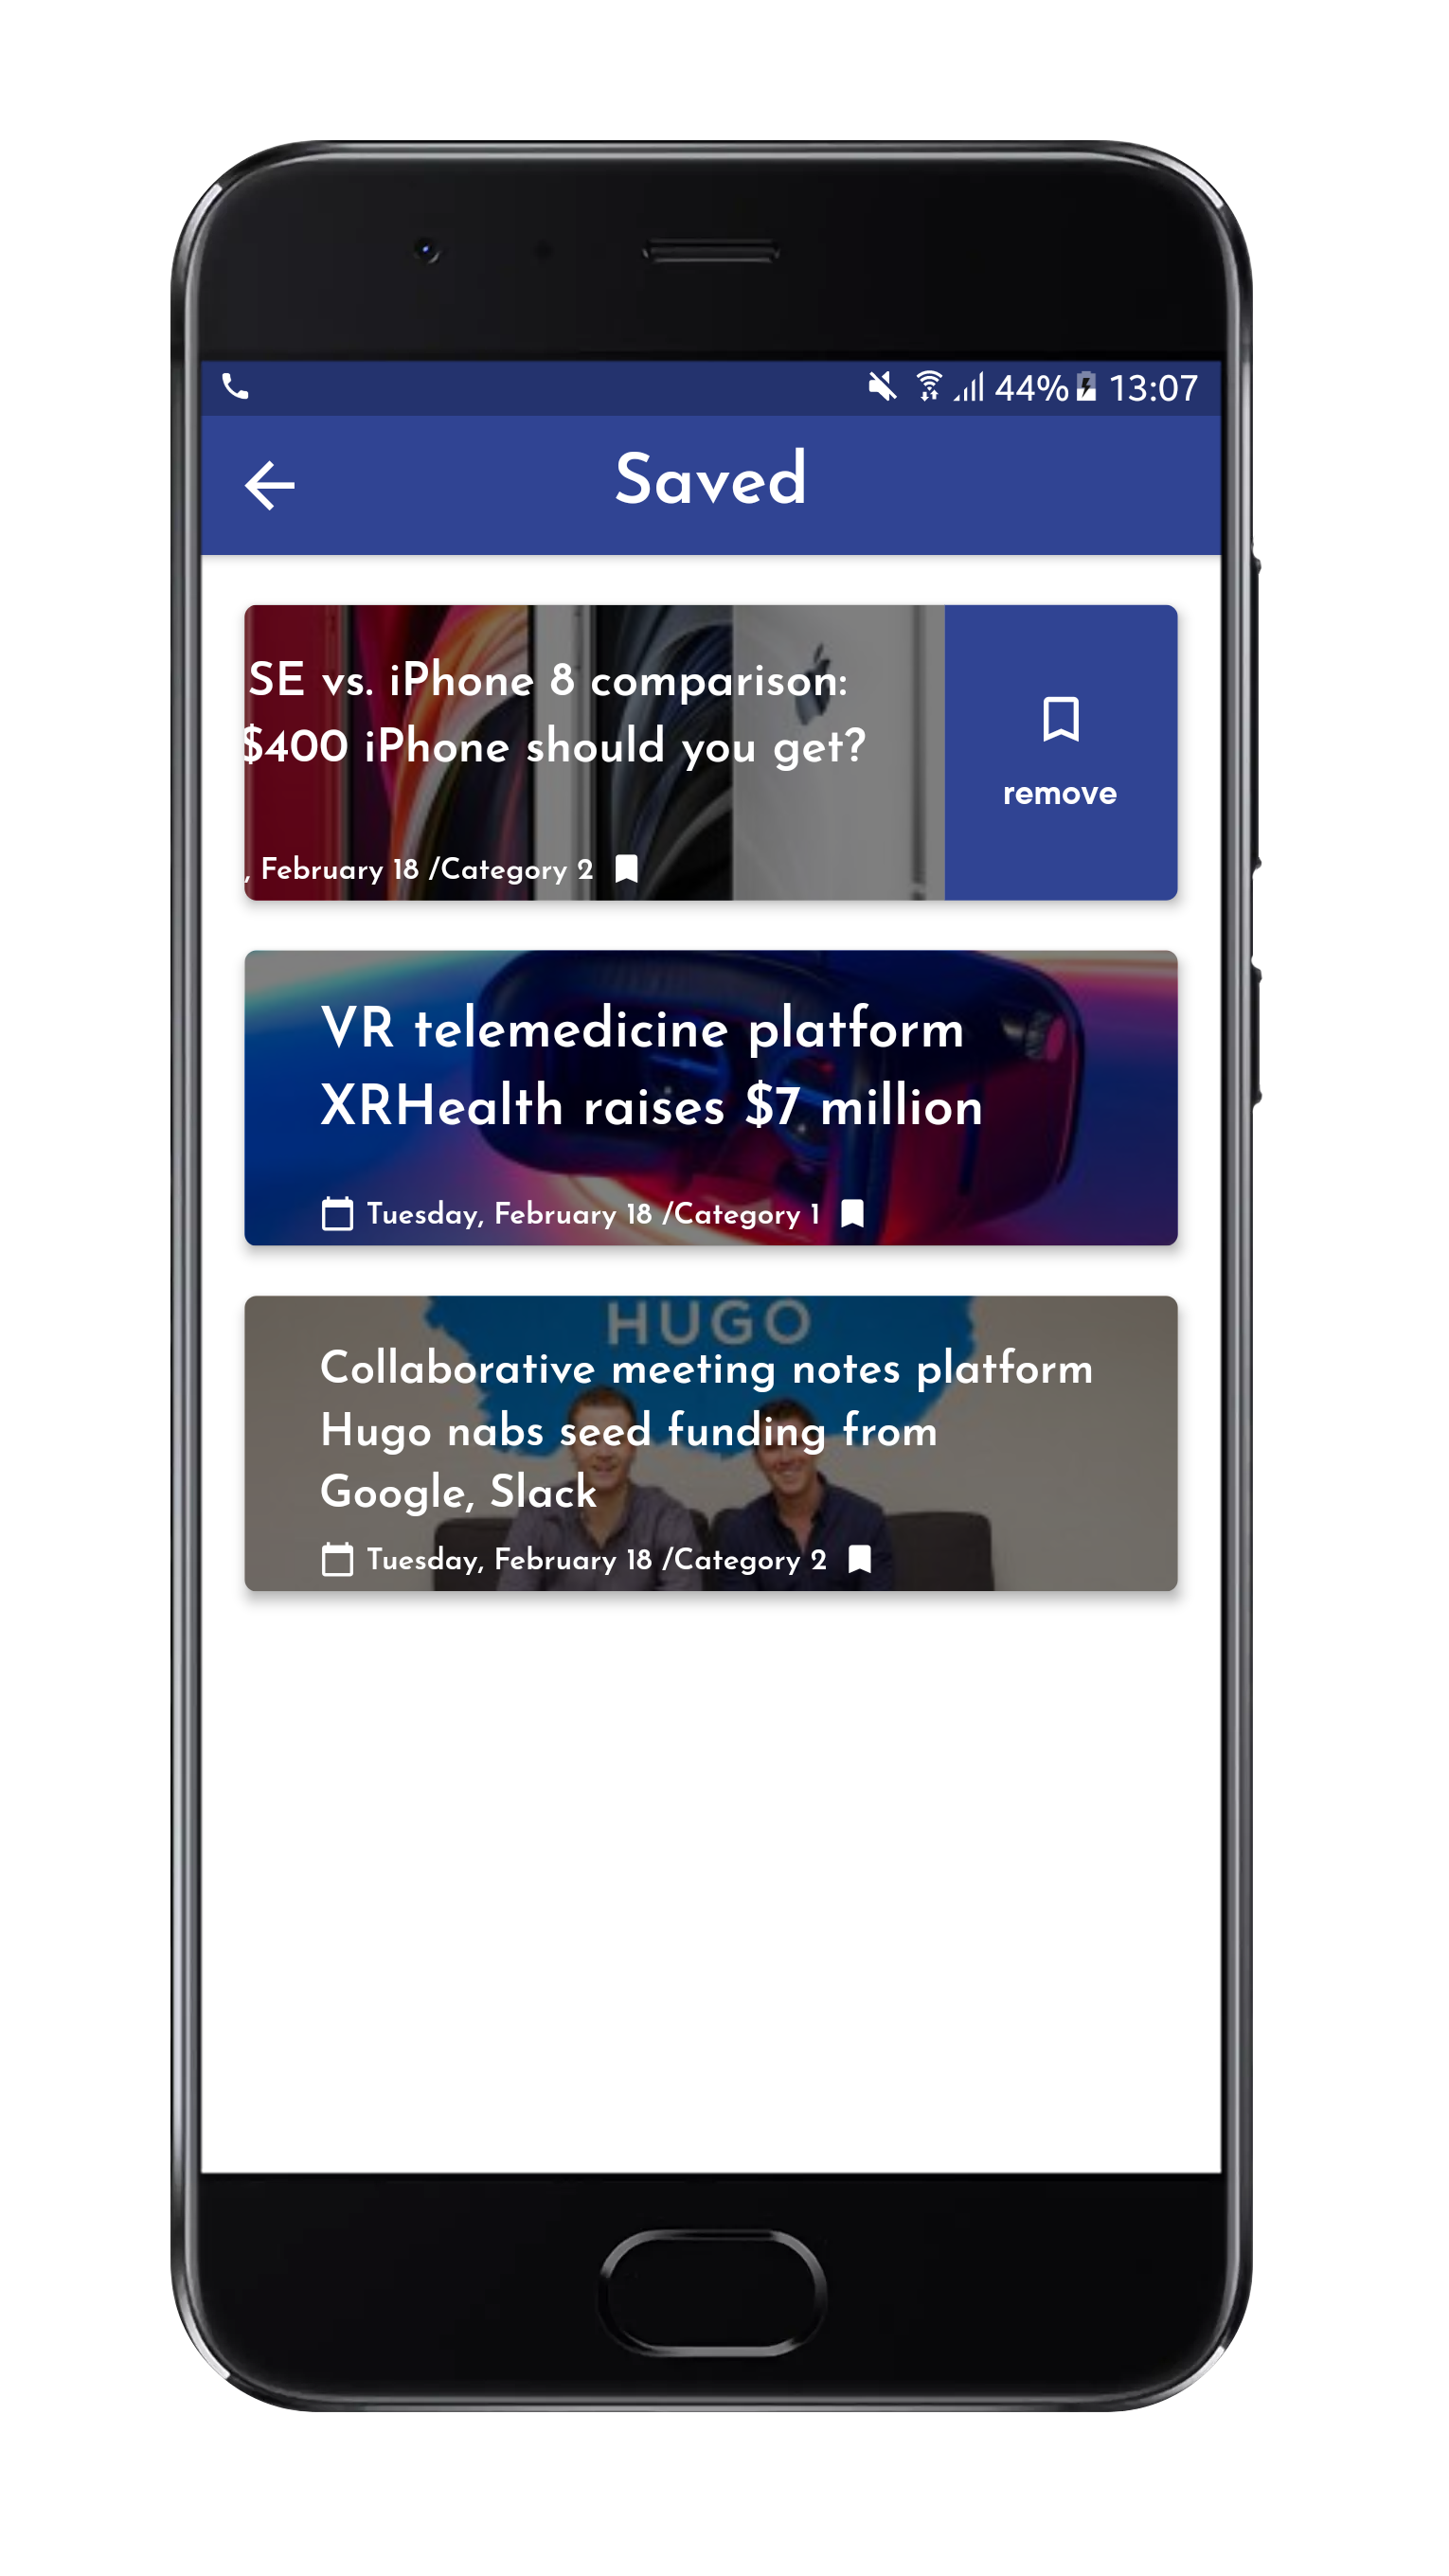
● Saved posts
● Comments support
● Social sharing
● Deep linking Support
● Offline reading
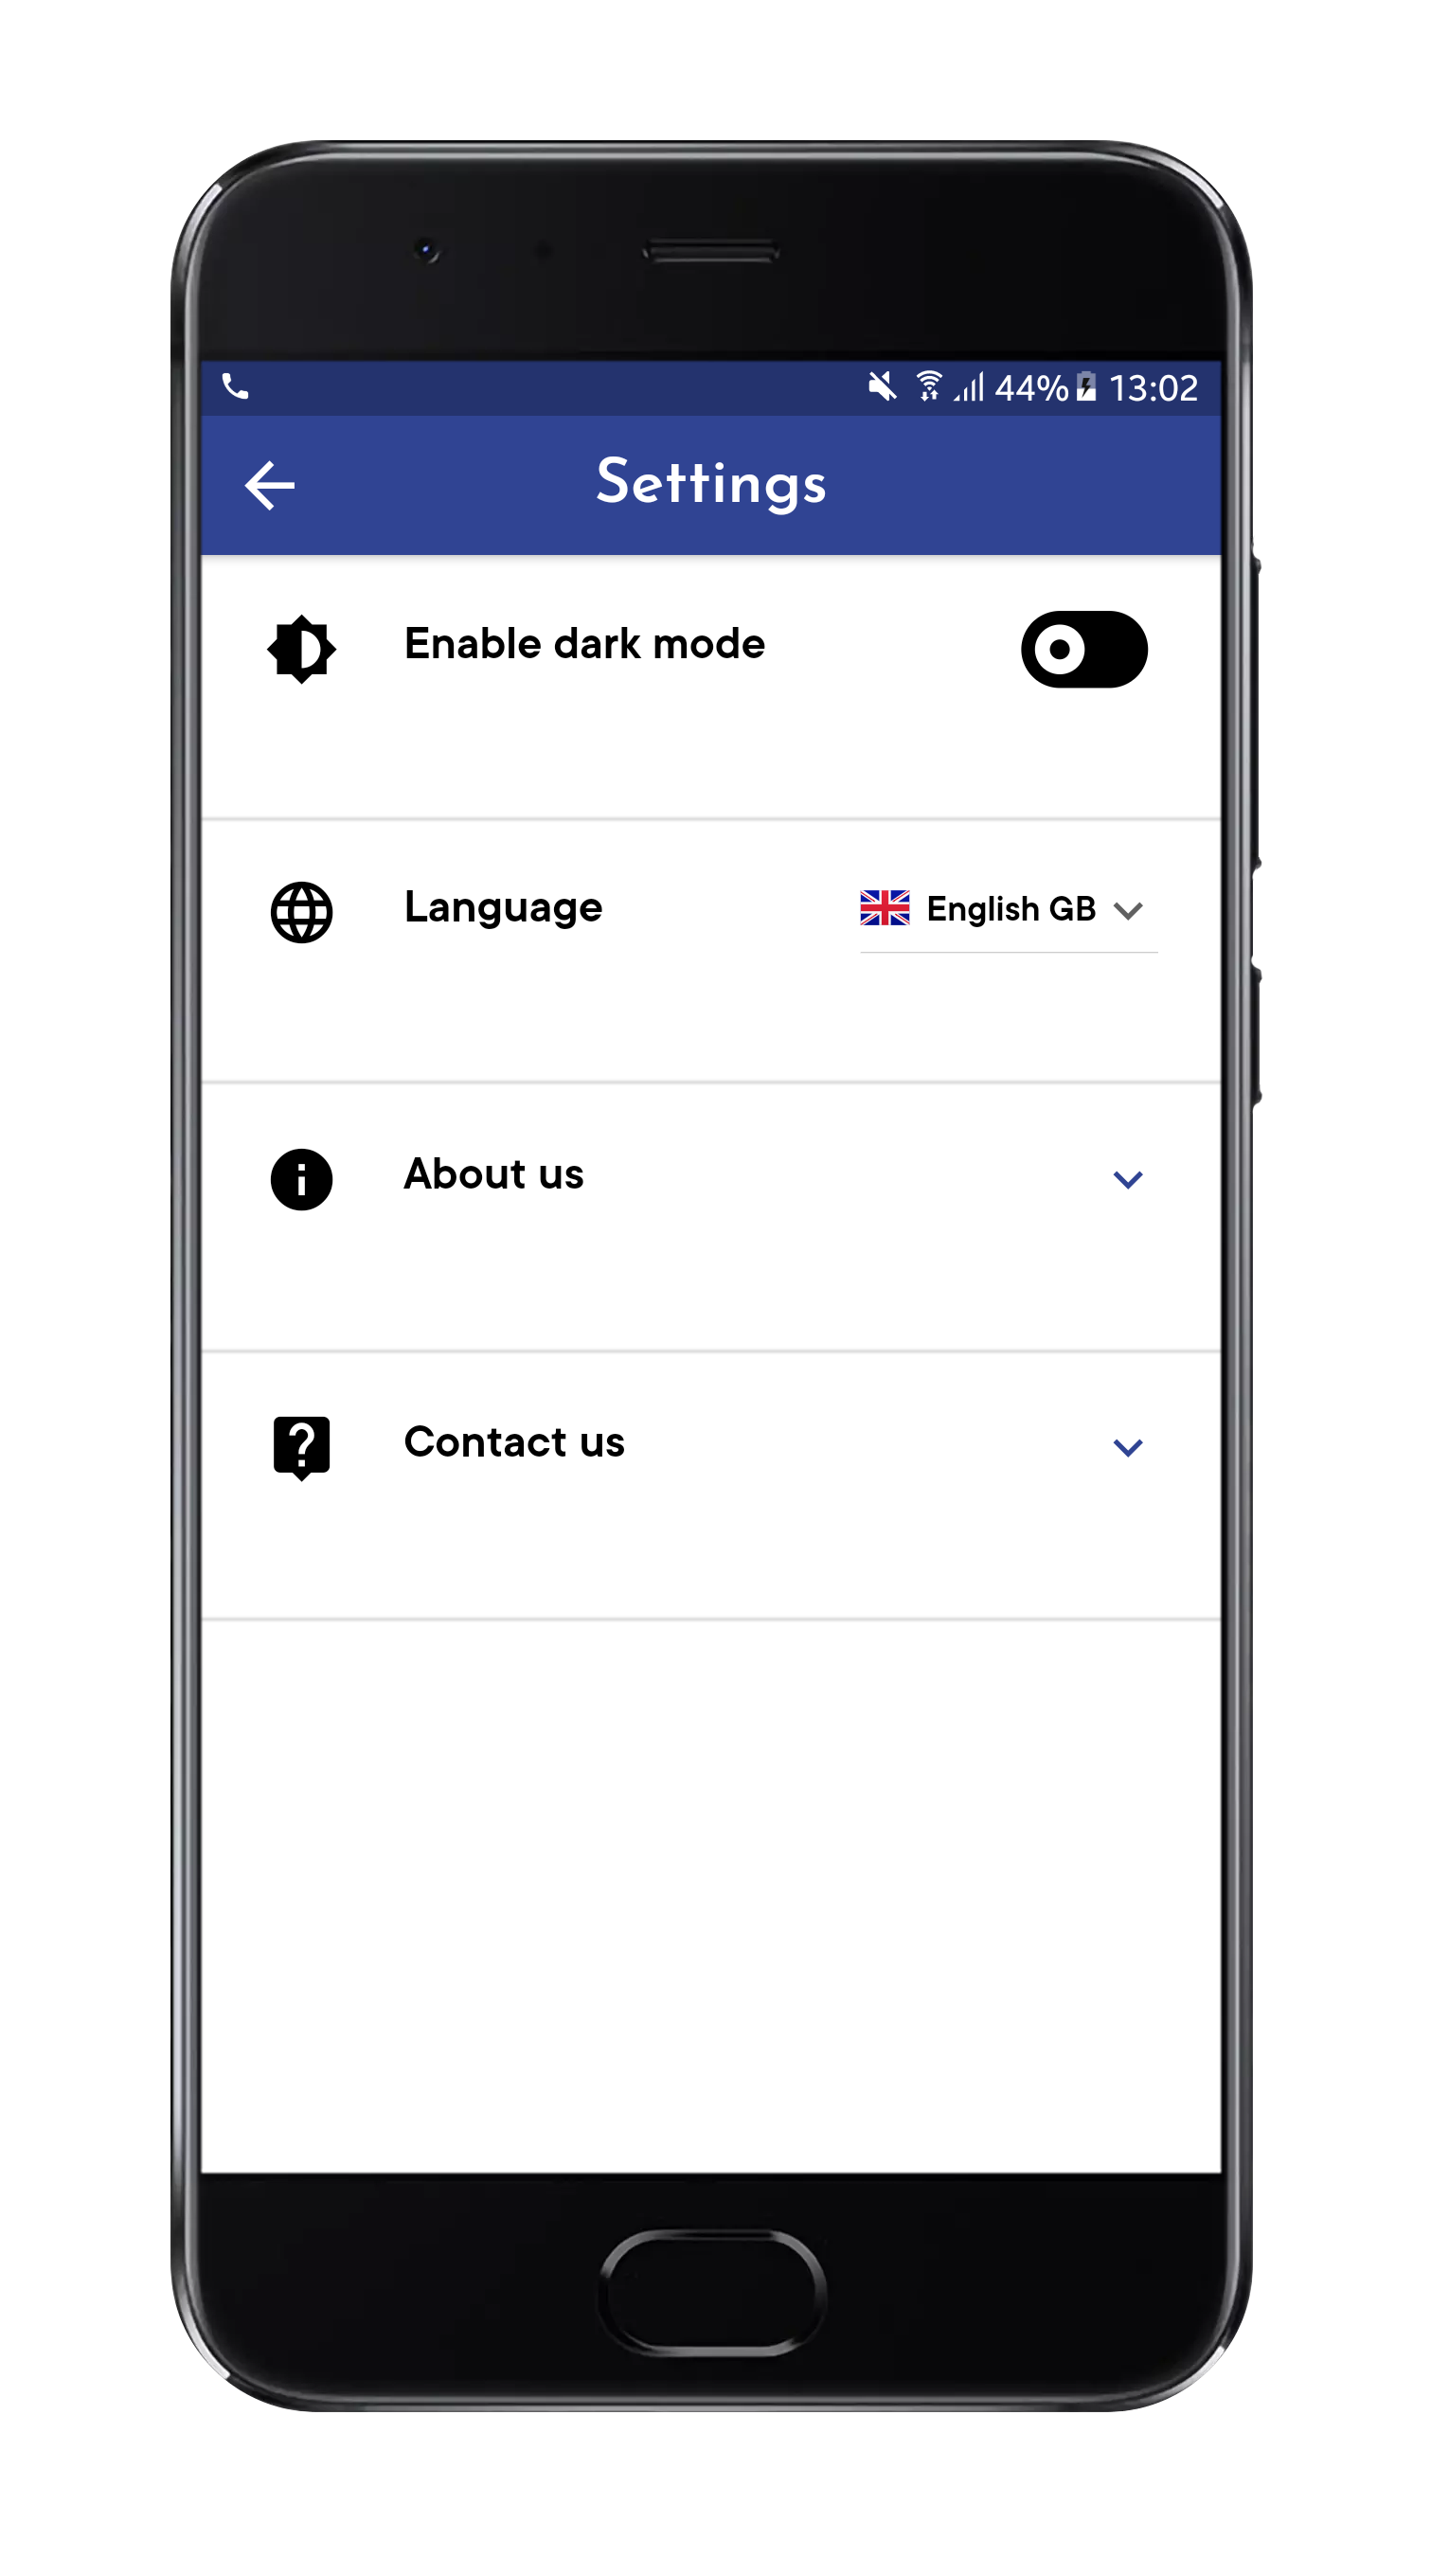
● Dark/Light theme
● Multi-language
● Splash screen
● Material Design
● Easy customizations
● Customizable demo
● Optimized performance
Installation
After unzipping the download pack, you will find a Project Folder
with all the files.
Next step You can edit apps with Flutter using any text editor
combined with command-line tools. However, we recommend using
one of our editor plugins for an even better experience. These
plugins offer you code completion, syntax highlighting, widget
editing assists, run & debug support and Follow this
Link
to add an editor plugin for Android Studio, IntelliJ, or VS
Code.
Add WpRest Api to your Wordpress
WP REST API Controller
WP REST API Controller allows admins to toggle the visibility of,
and customize the endpoints for, all custom post types and all
taxonomies within WordPress with an easy-to-use graphical interface.
Additionally, you can tweak visibility and customize the meta data
attached to the API response, the app work with the API default
settings so nothing need to change or tweak.
This videos tutorial walk you through how to install the plugin to
your WordPress website
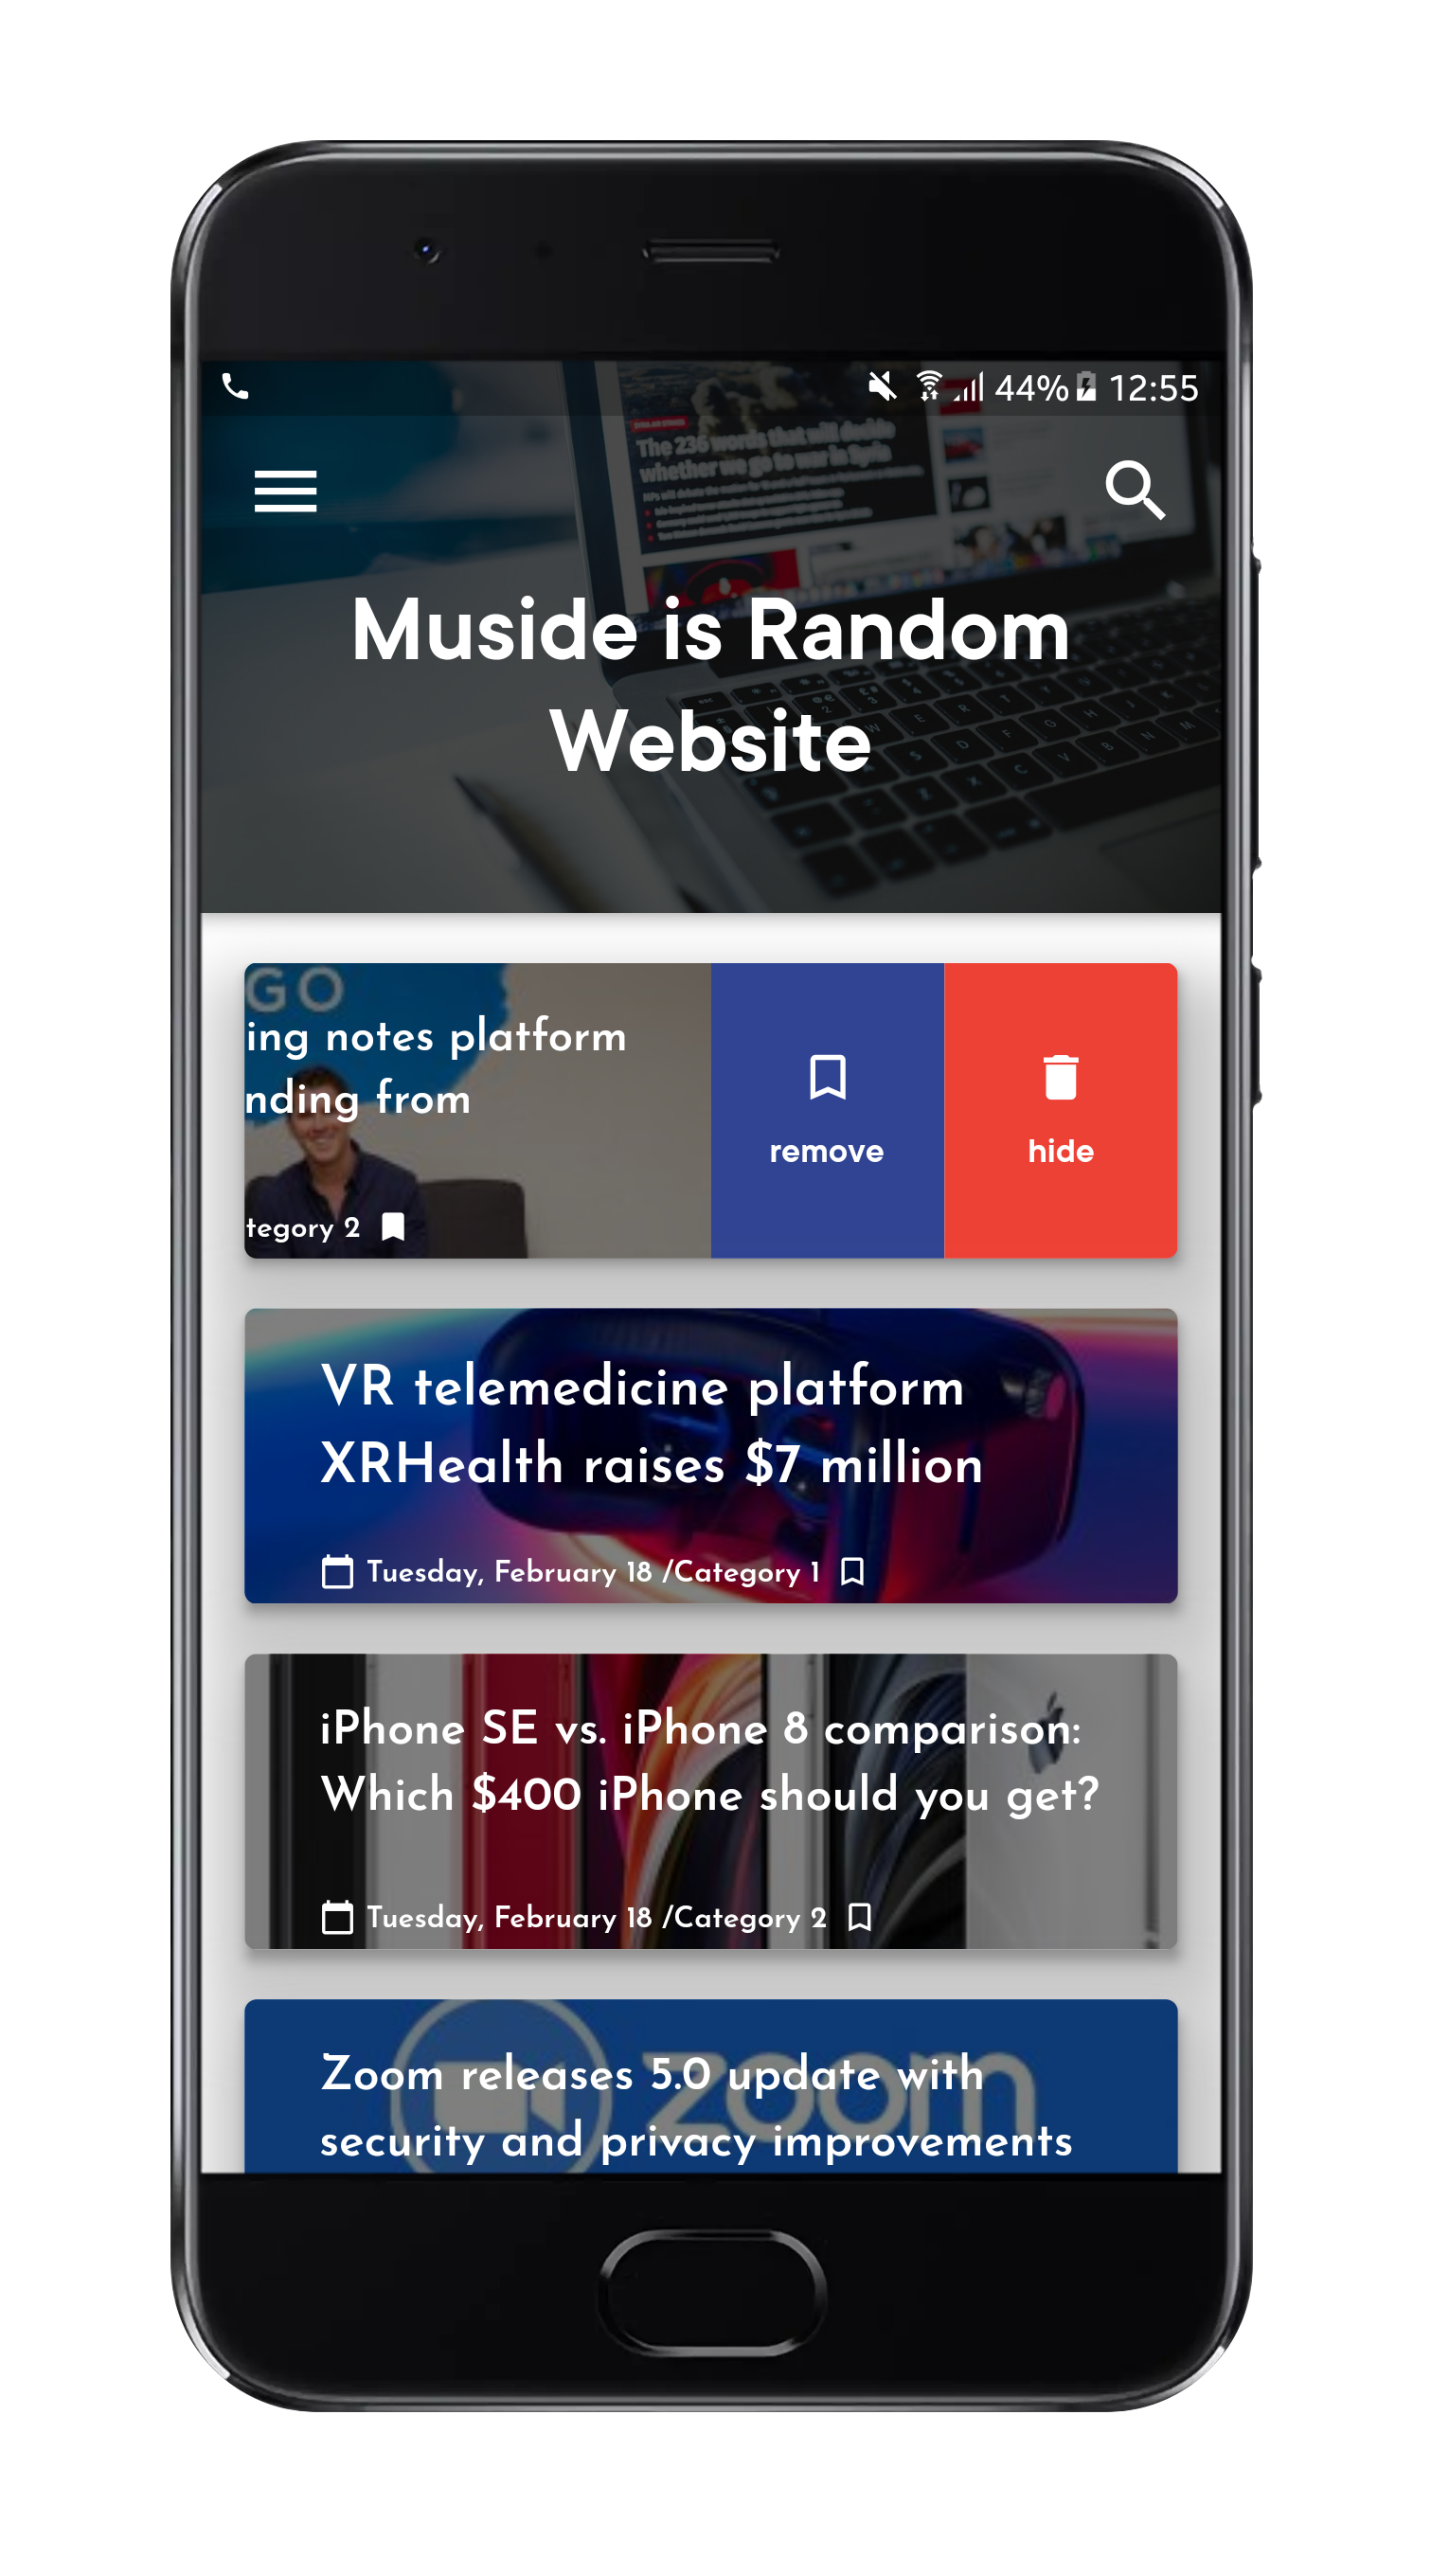
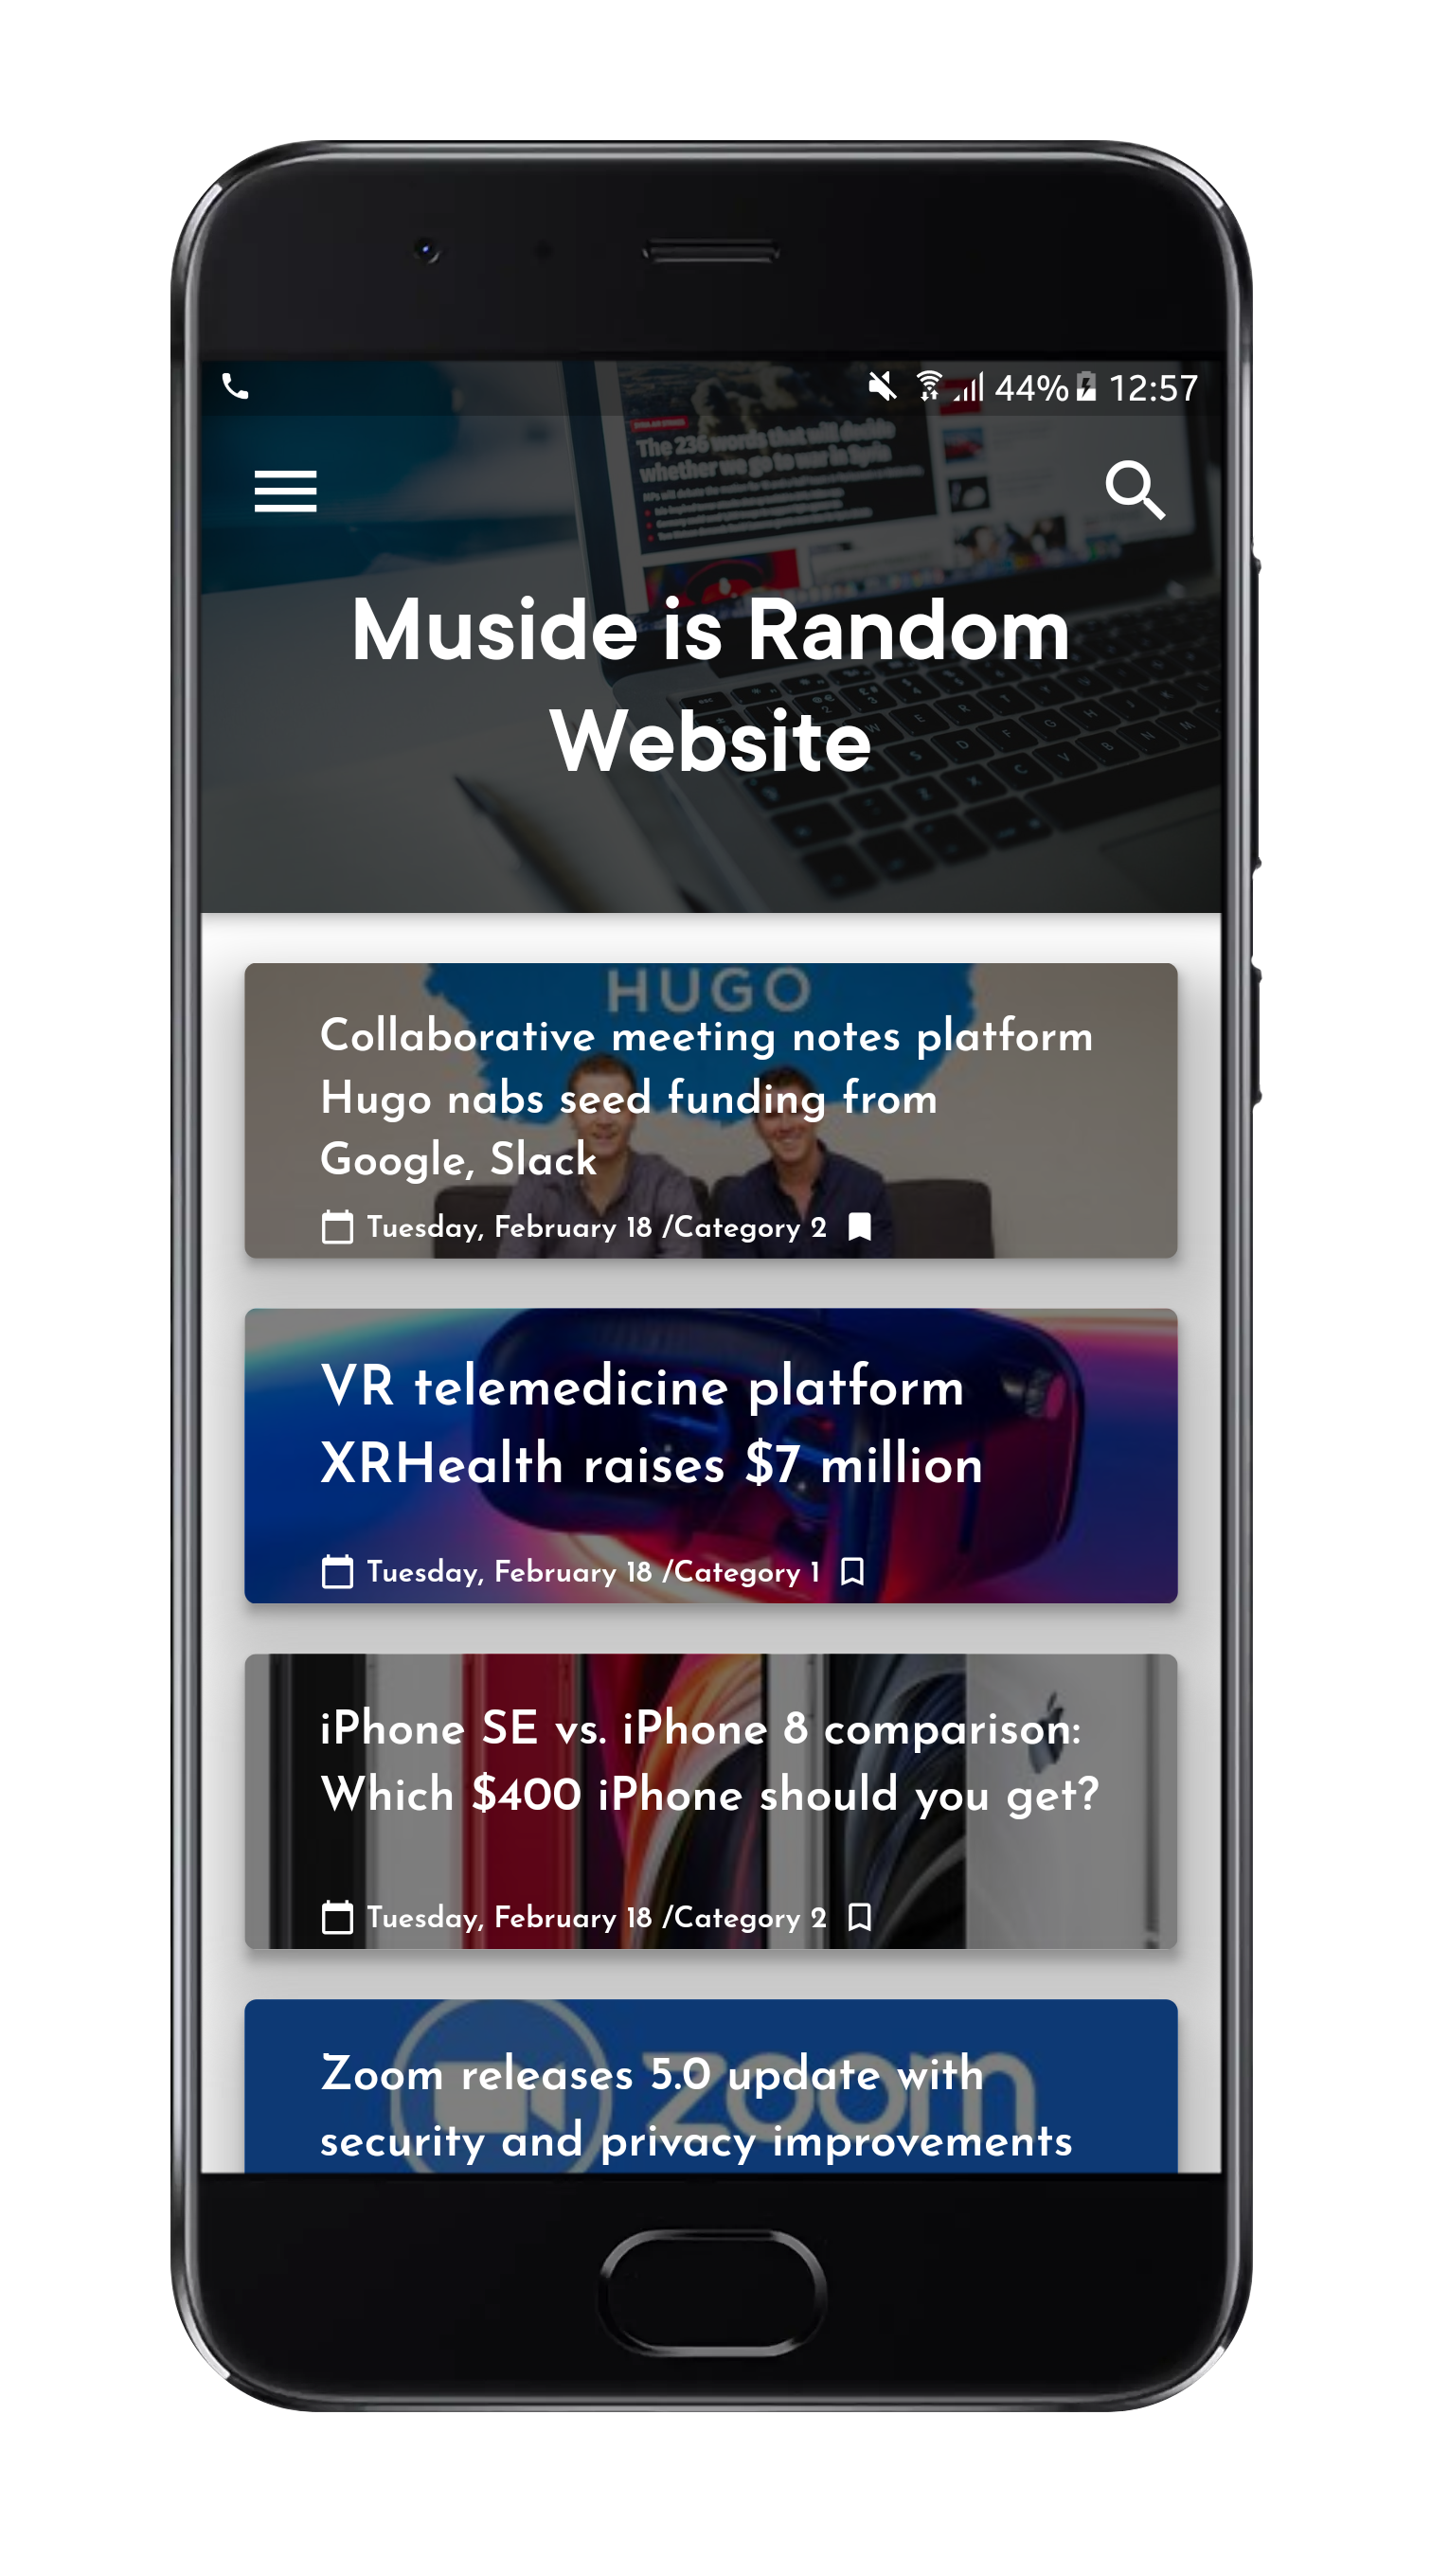
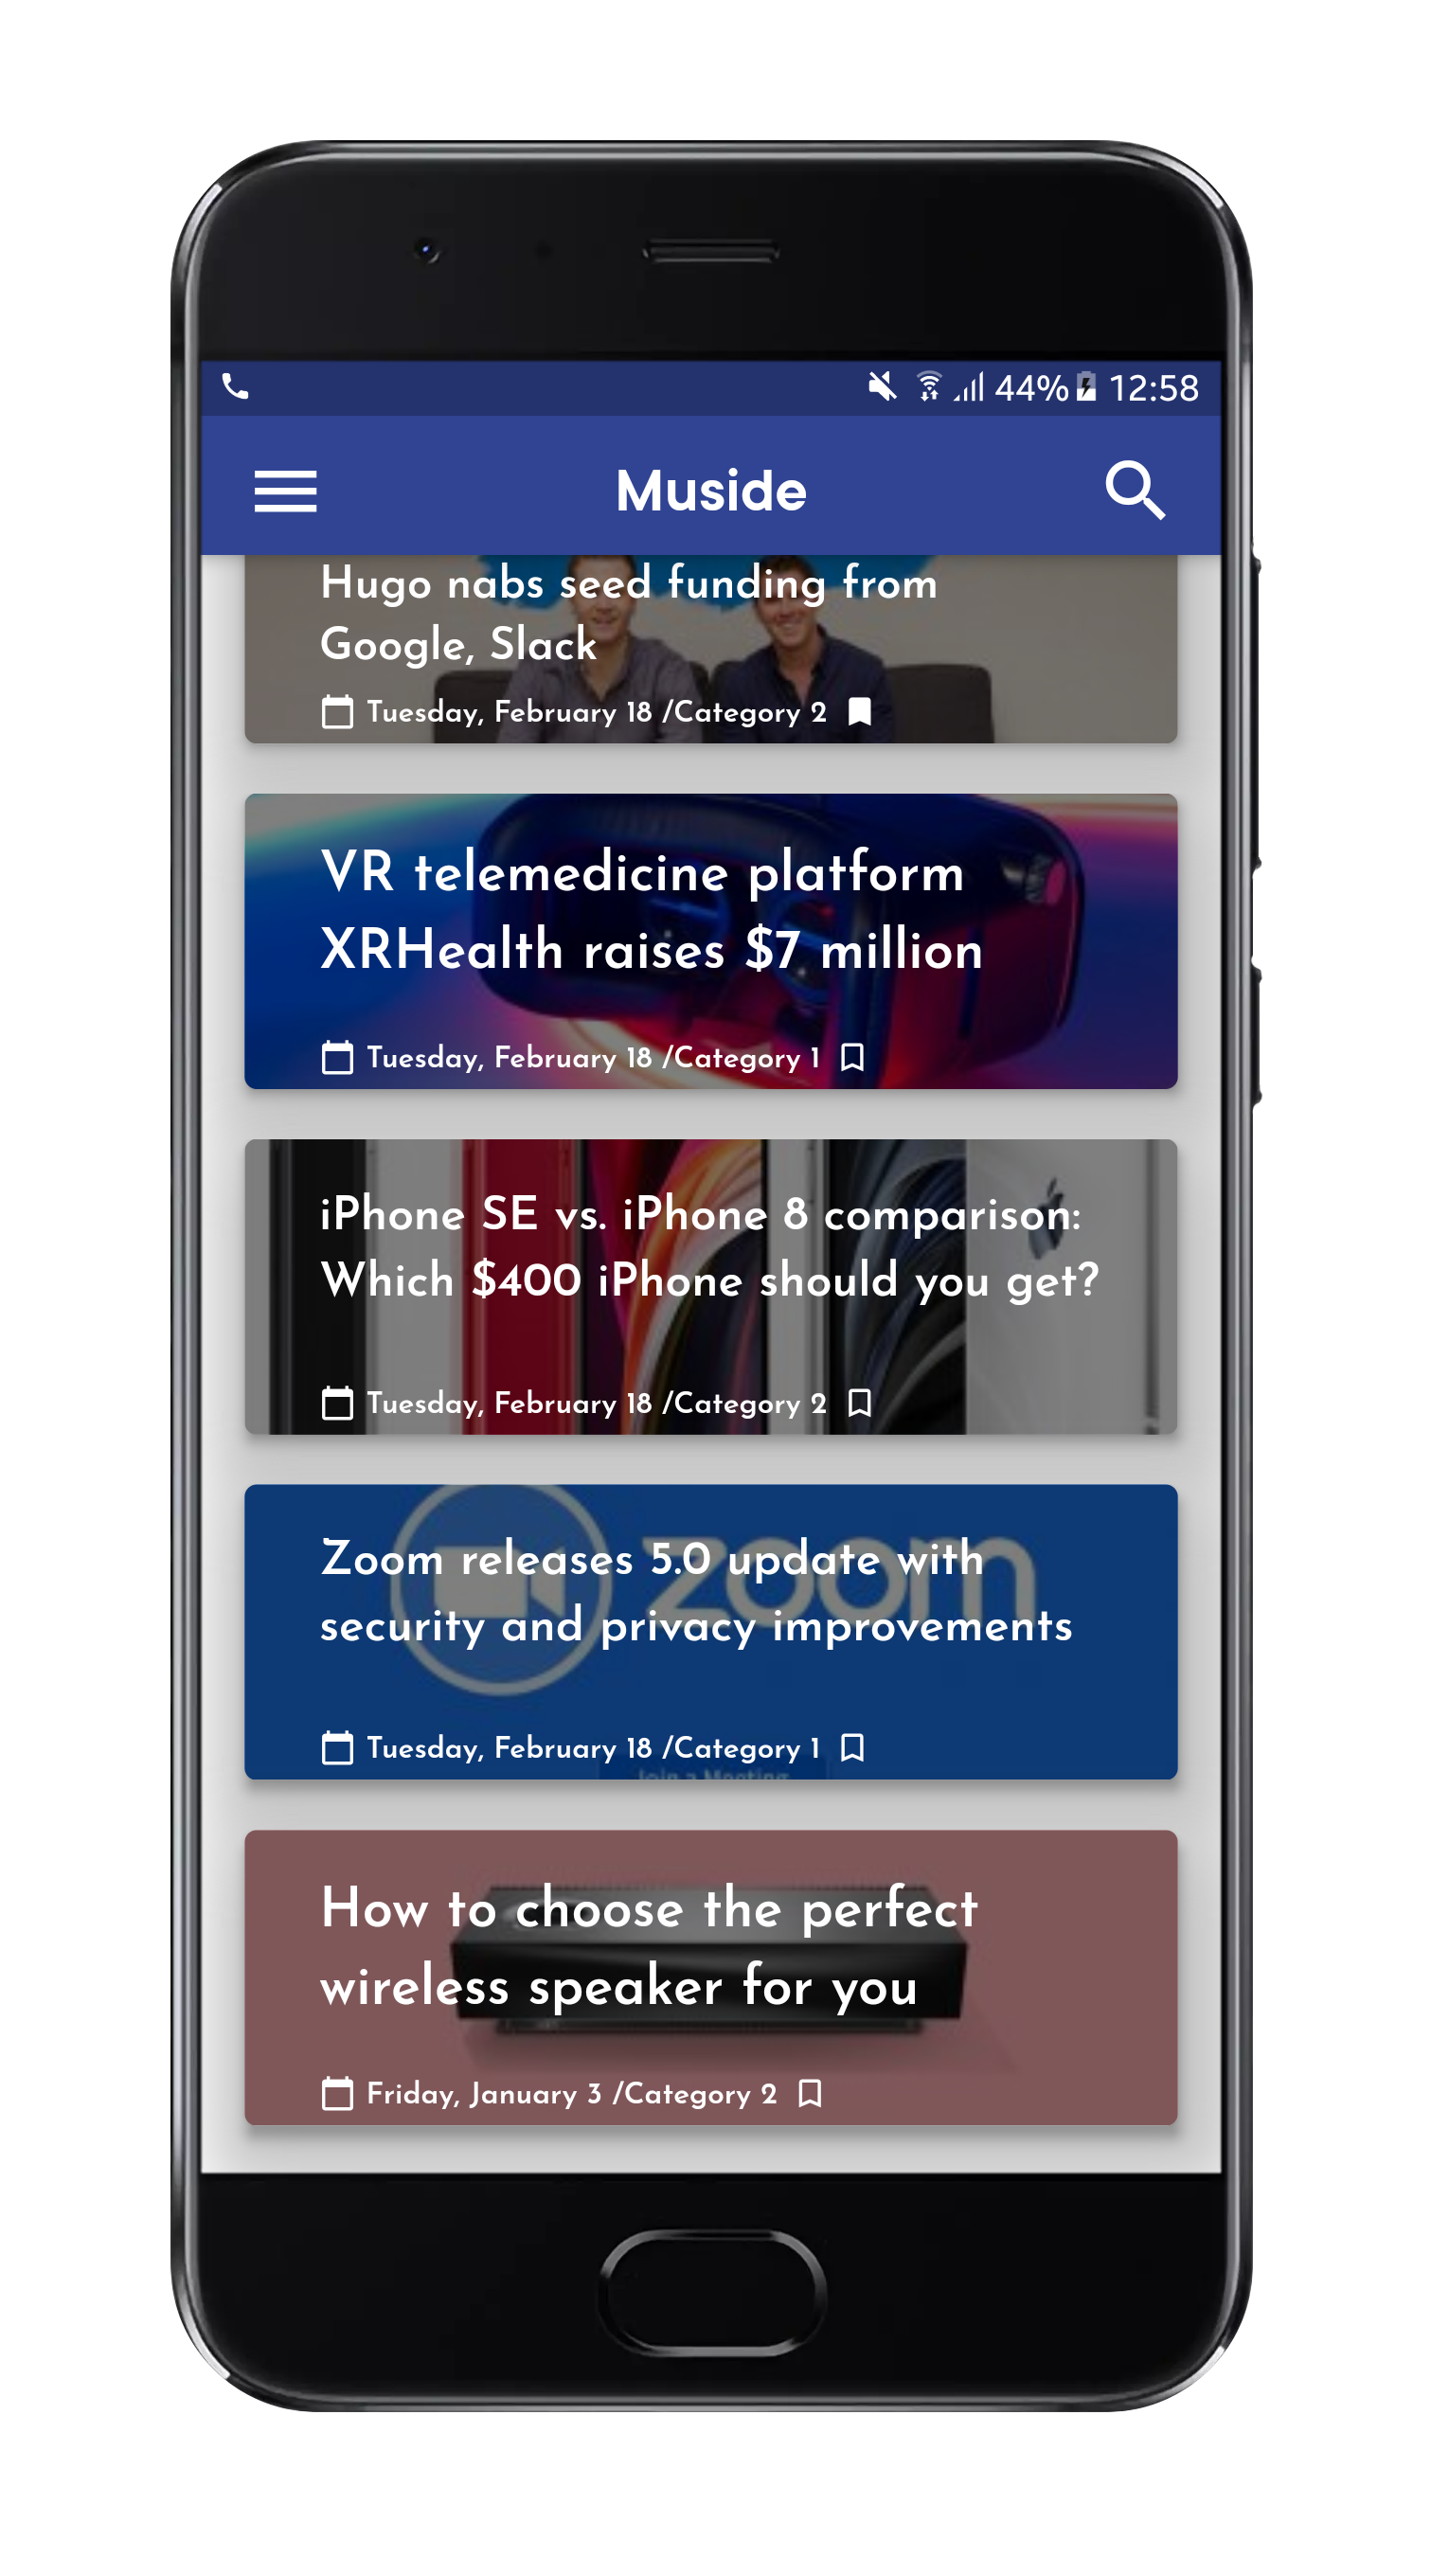
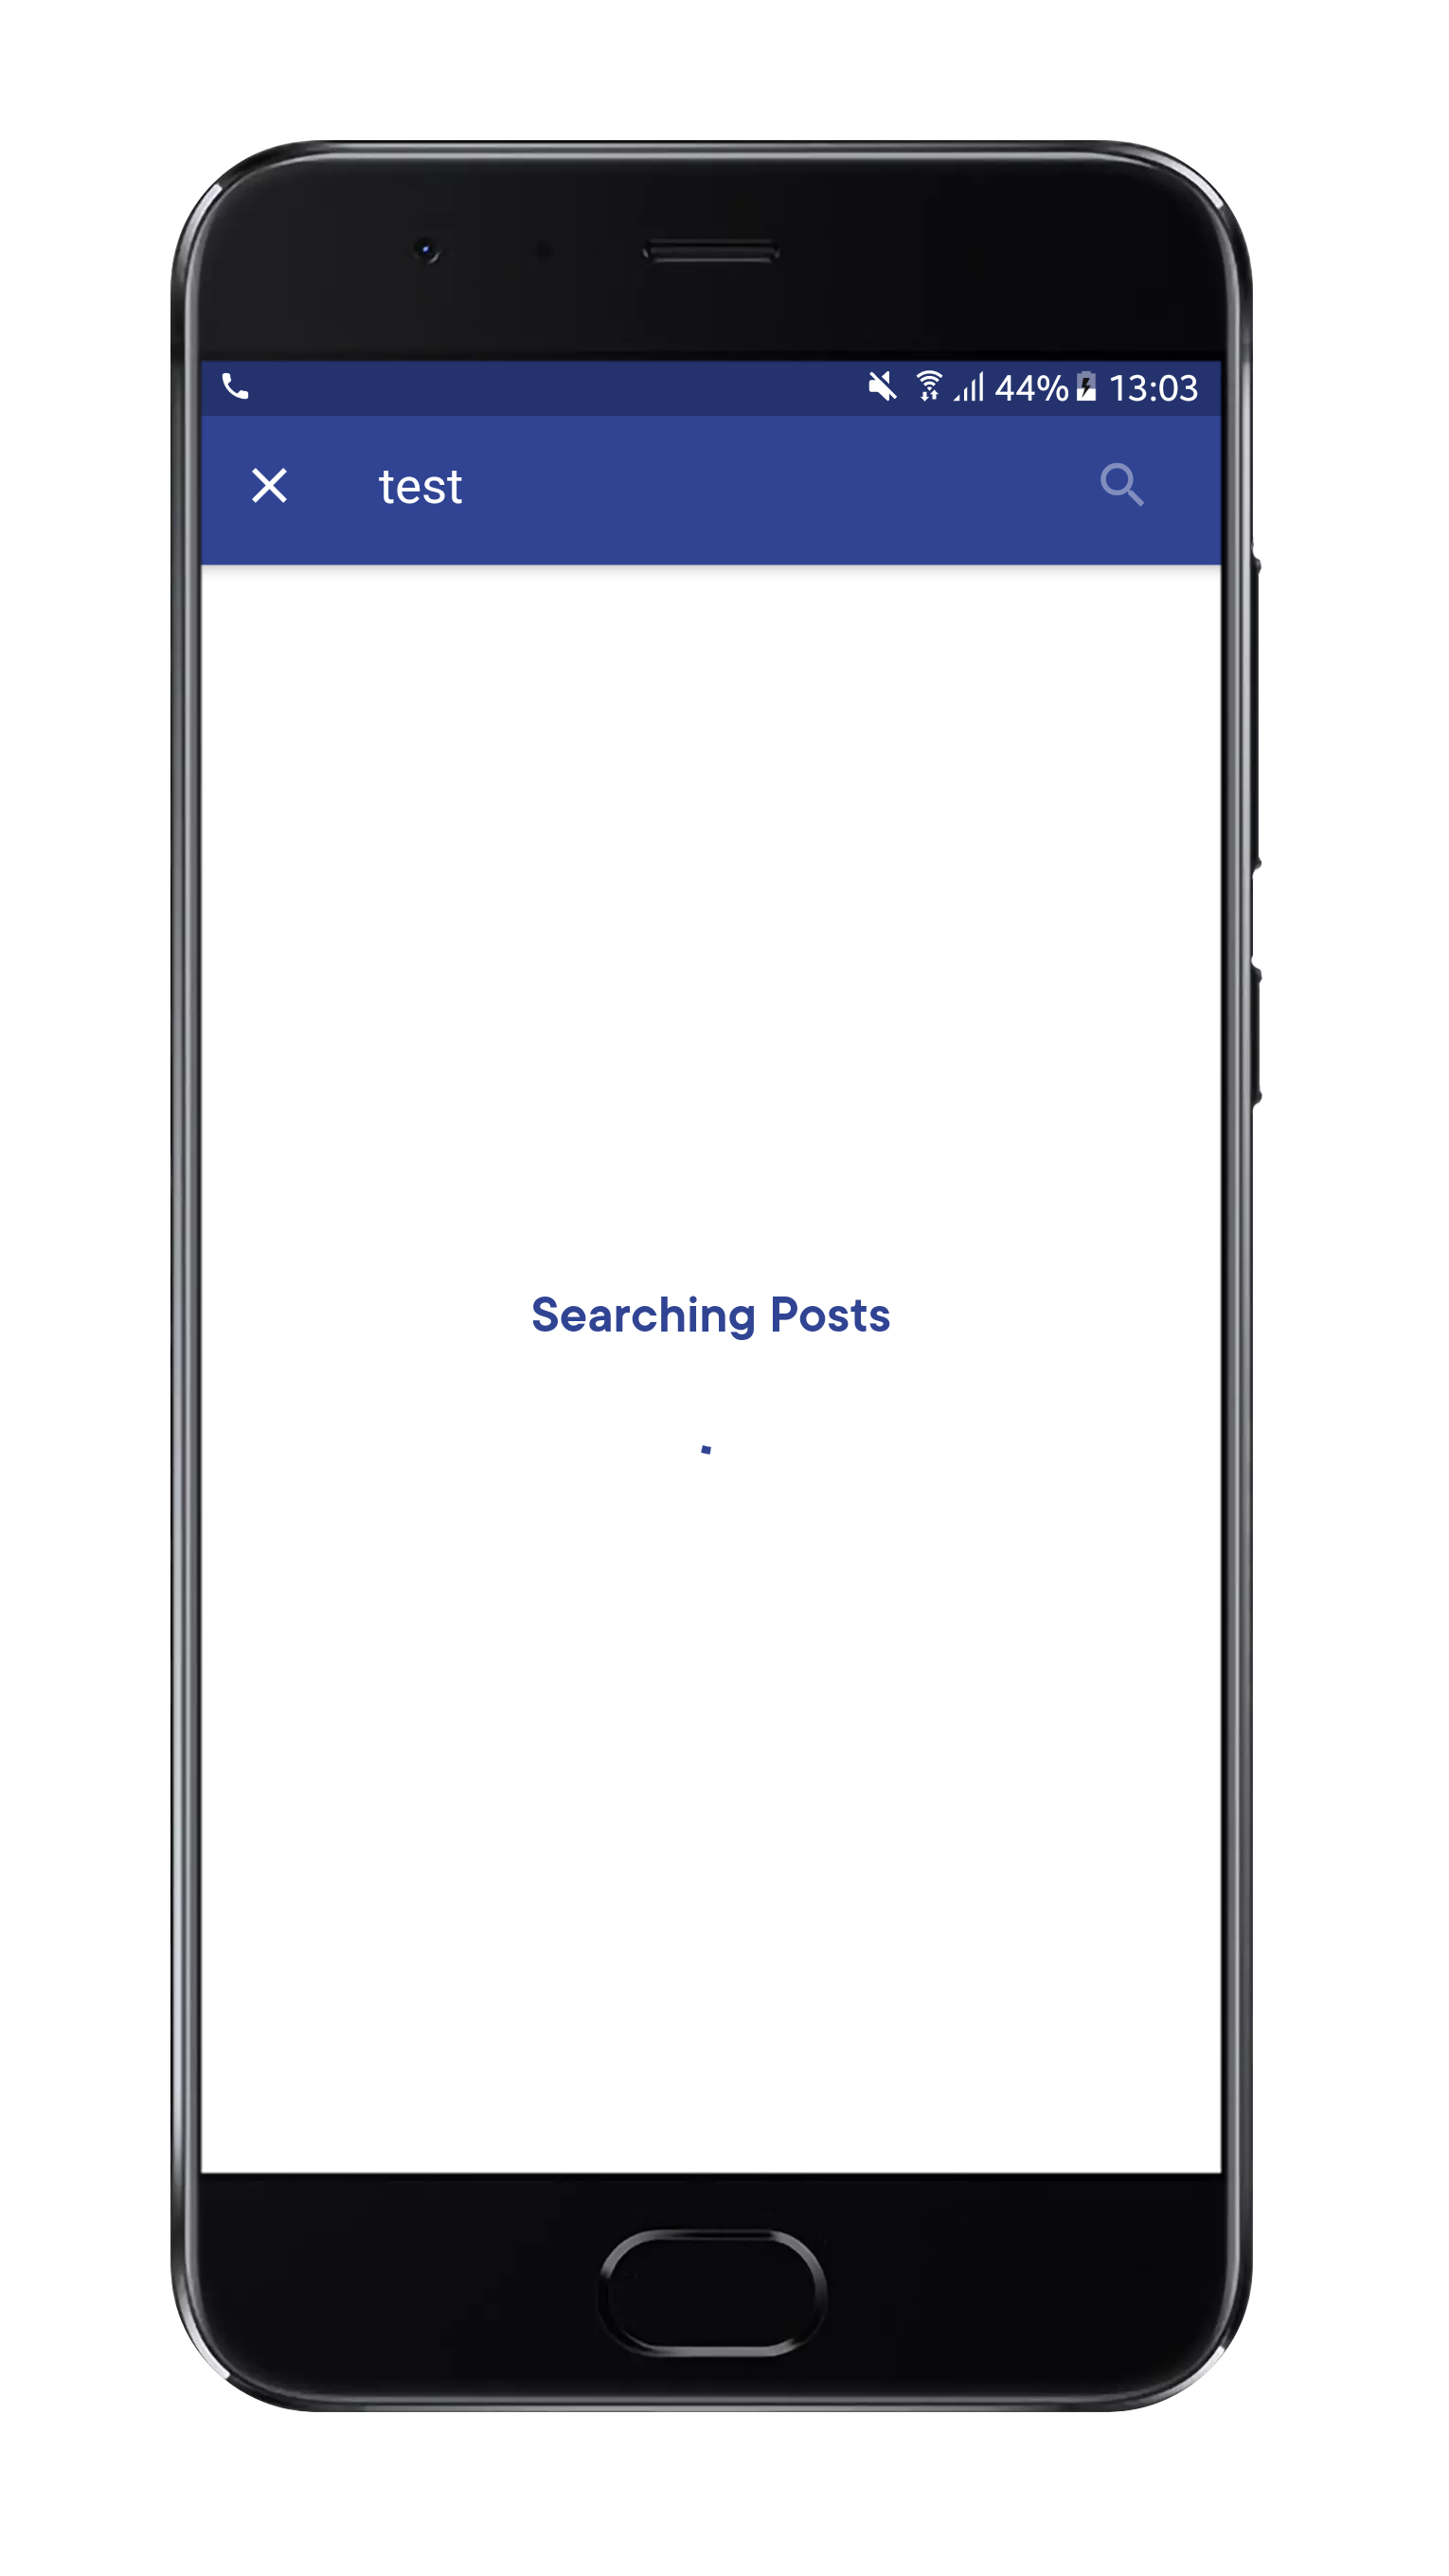
App Pages
Home Page
Search Page
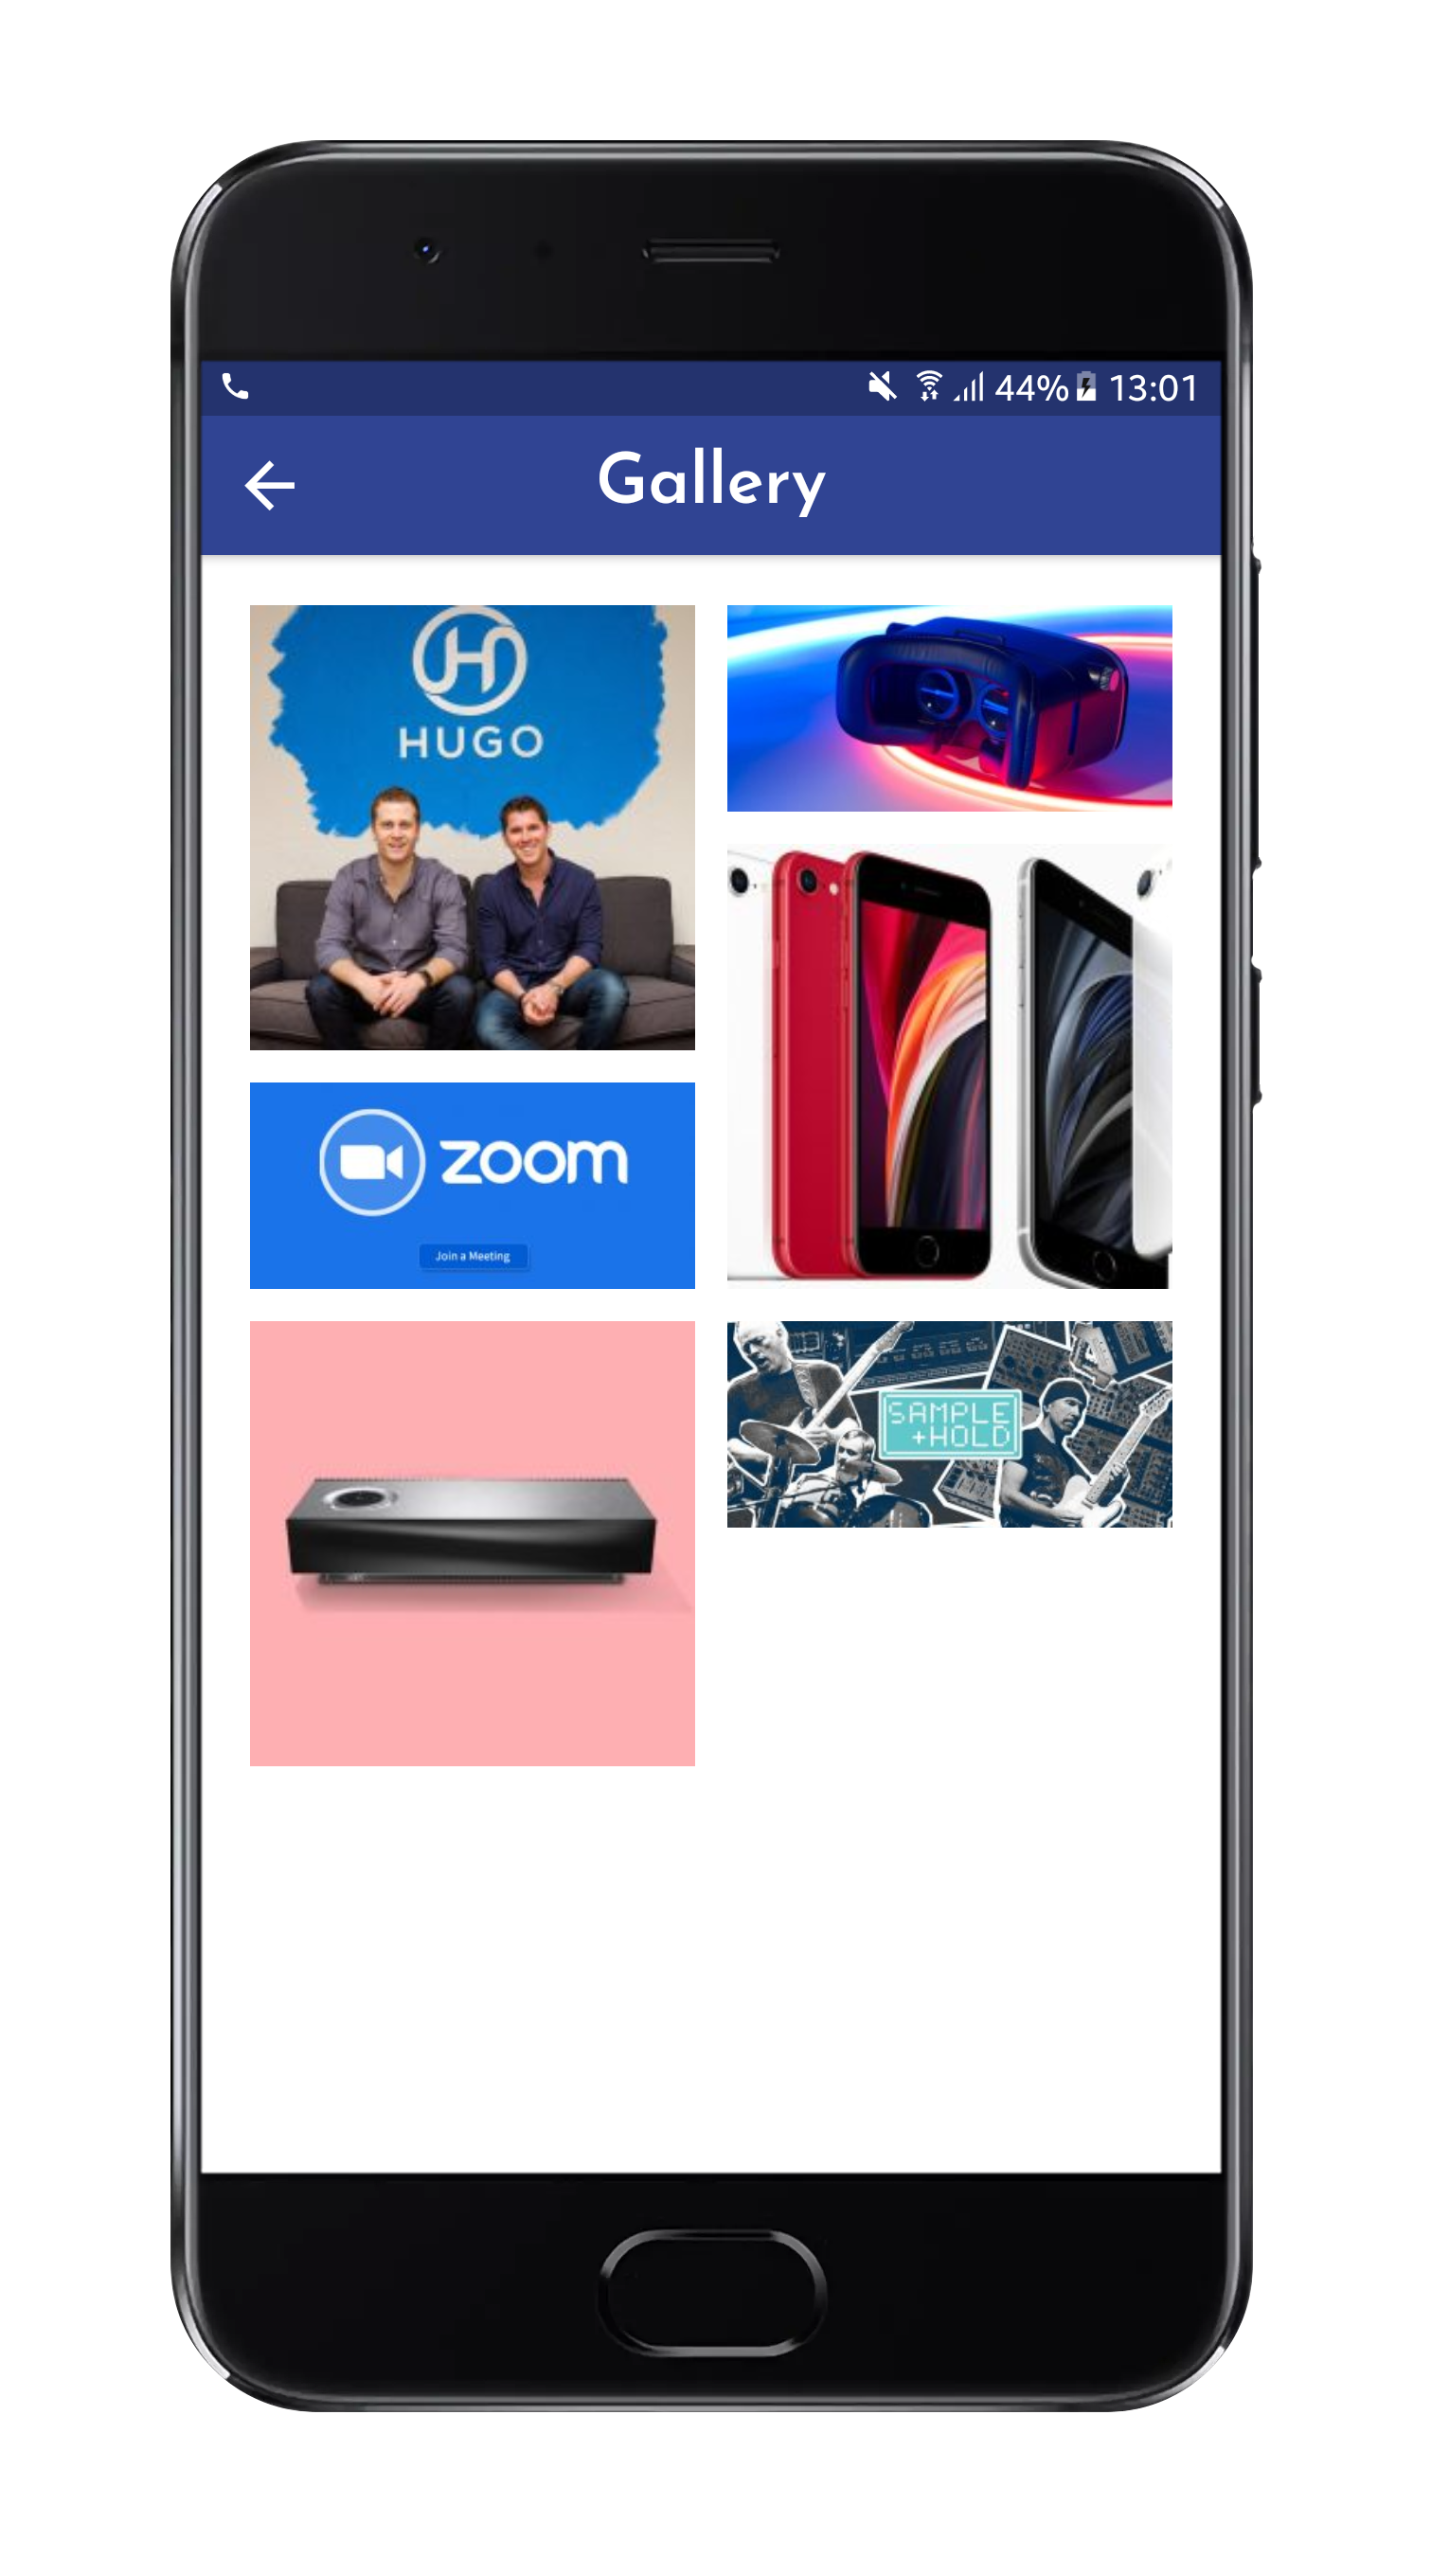
Gallery Page & Saved posts
Categories Page & Settings Page
Splash Page
Setup Admob and OneSignal
Setup Push Notifications
1. Lets with OneSignal setup since both Onesignal and Admob need firebase project we need to create it first
,follow this link to set up firebase project and link it with OneSignal.
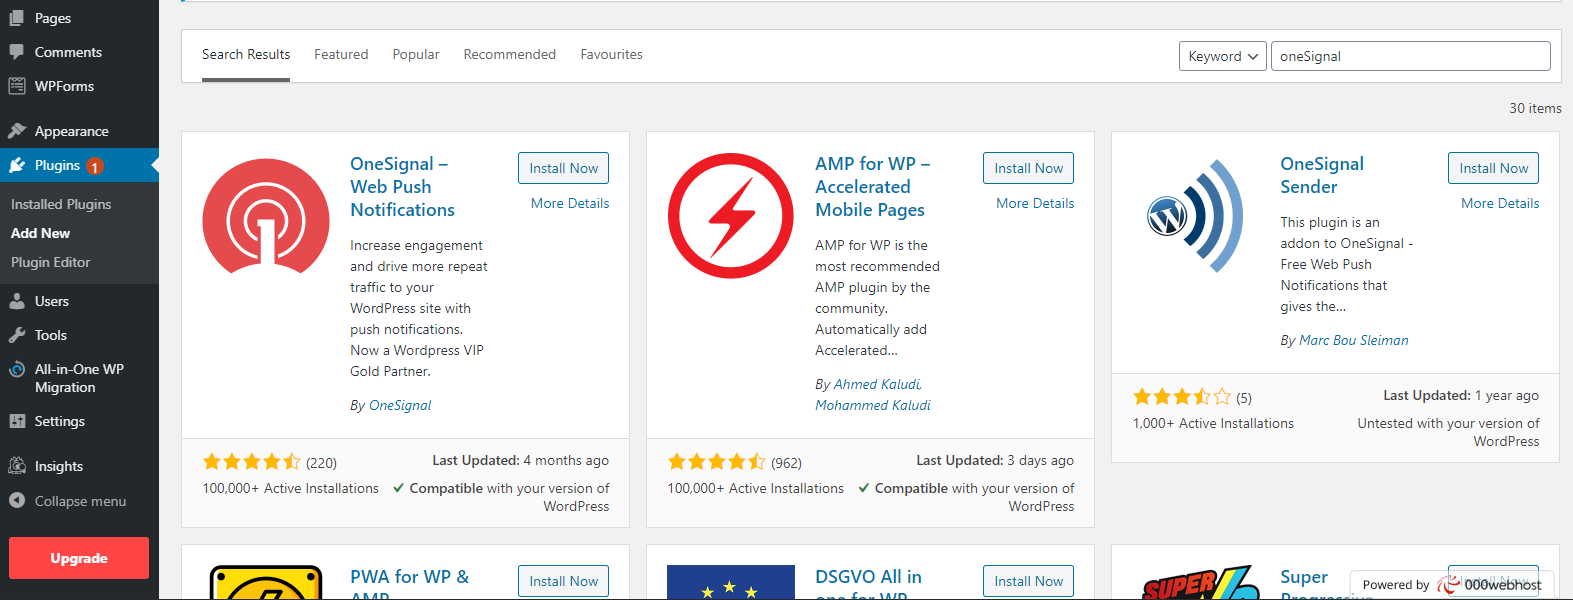
2.now we need to install OneSignal plugin to our website and activate it.
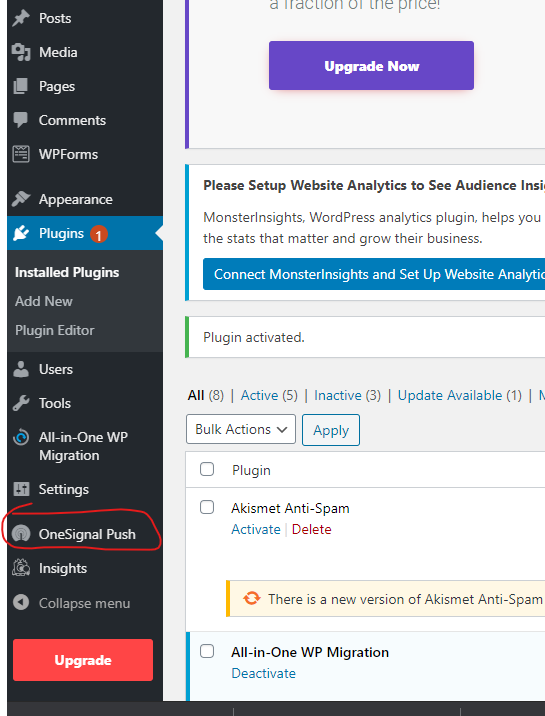
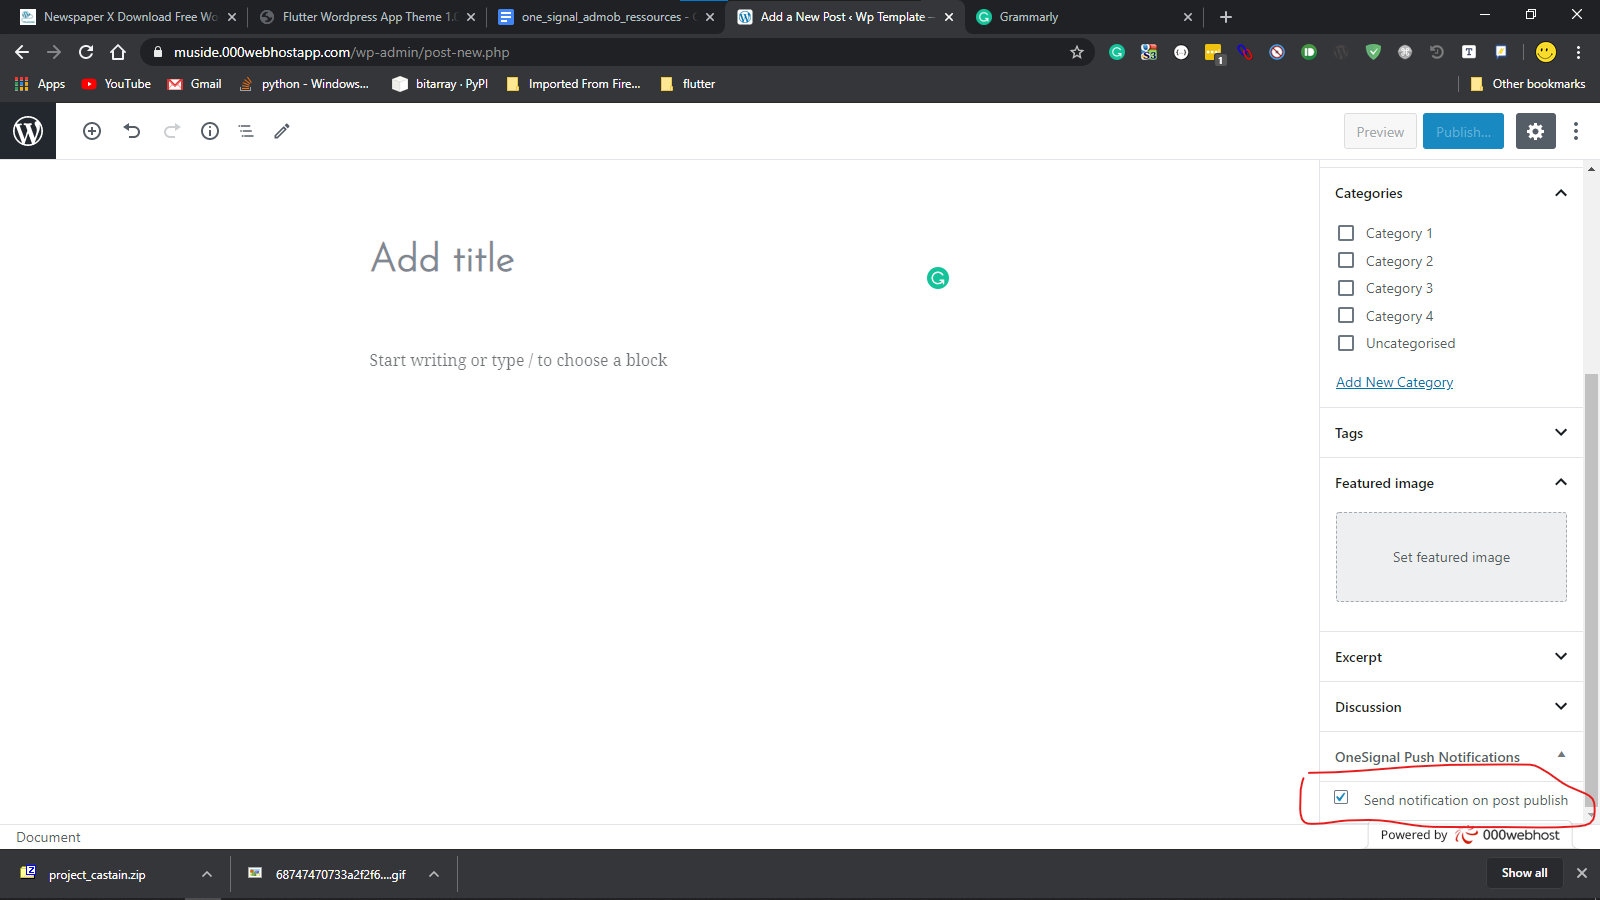
3. if everything set up correctly you should see a new section on your dashboard with OneSignal menu.
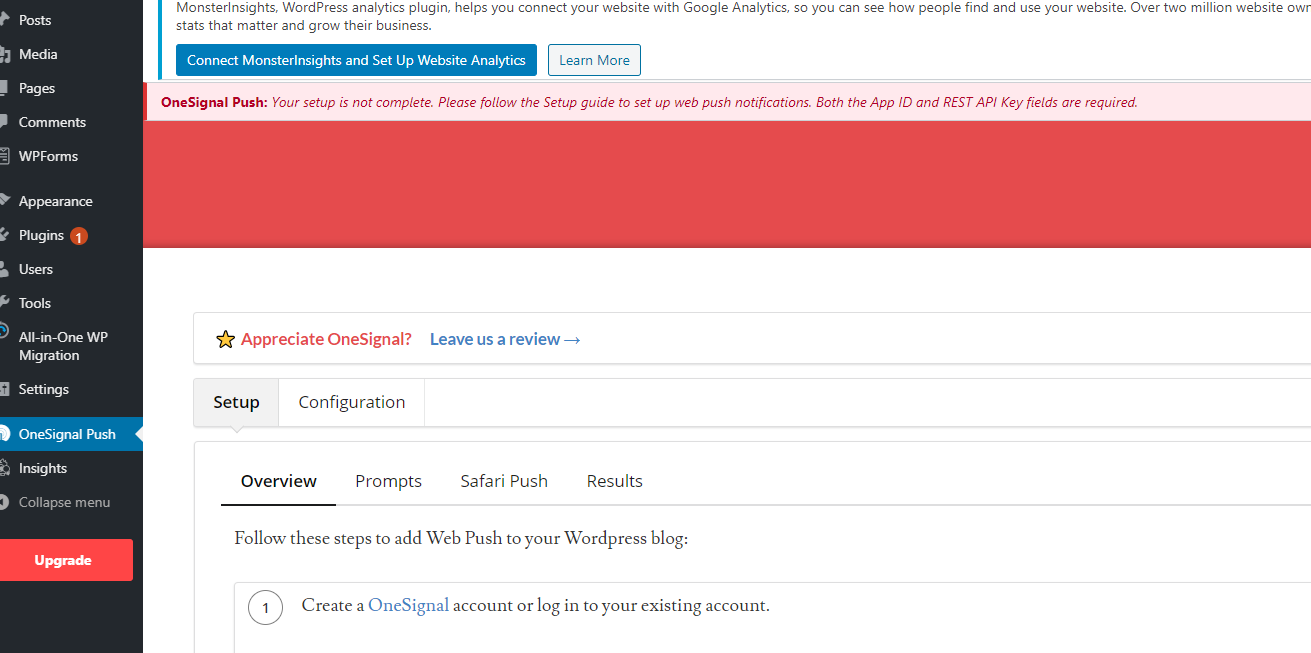
4.click on thats menu and should redirect you to this page
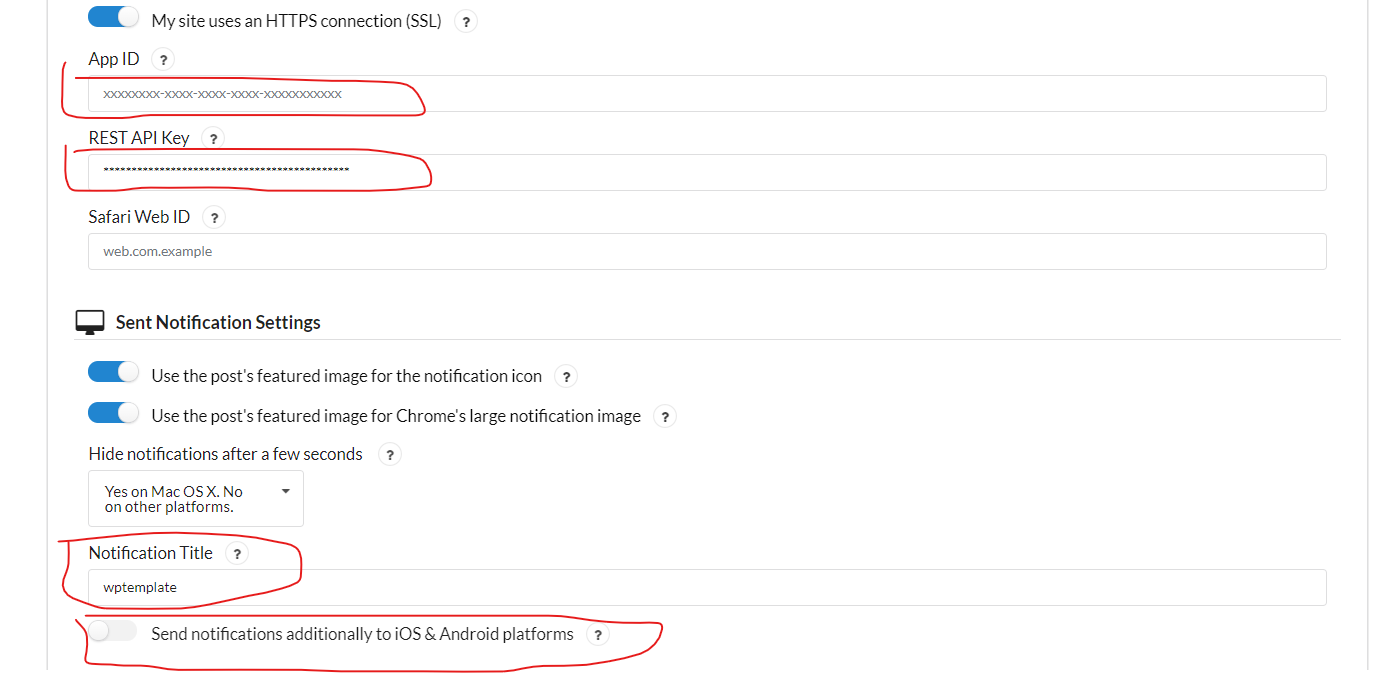
5.now you need to fill the requirements fields as App id and REST API Key, go to OneSignal website into the
app you previously created, on Keys & IDs section and grab them, then set notification title recommended to
the website title , and enable android notifications
6.make sure you filled all the info correctly and save the configuration.
7.now every time you publish a new post you app users will receive notification of it (you can choose to send
it or not)
7.the only thing left is to add one signal app id to the config file in the project ,check this section
Setup Admob
1. go to the previously created firebase project, thats been created on OneSignal setup or you can create a
new project, we are using the created one .
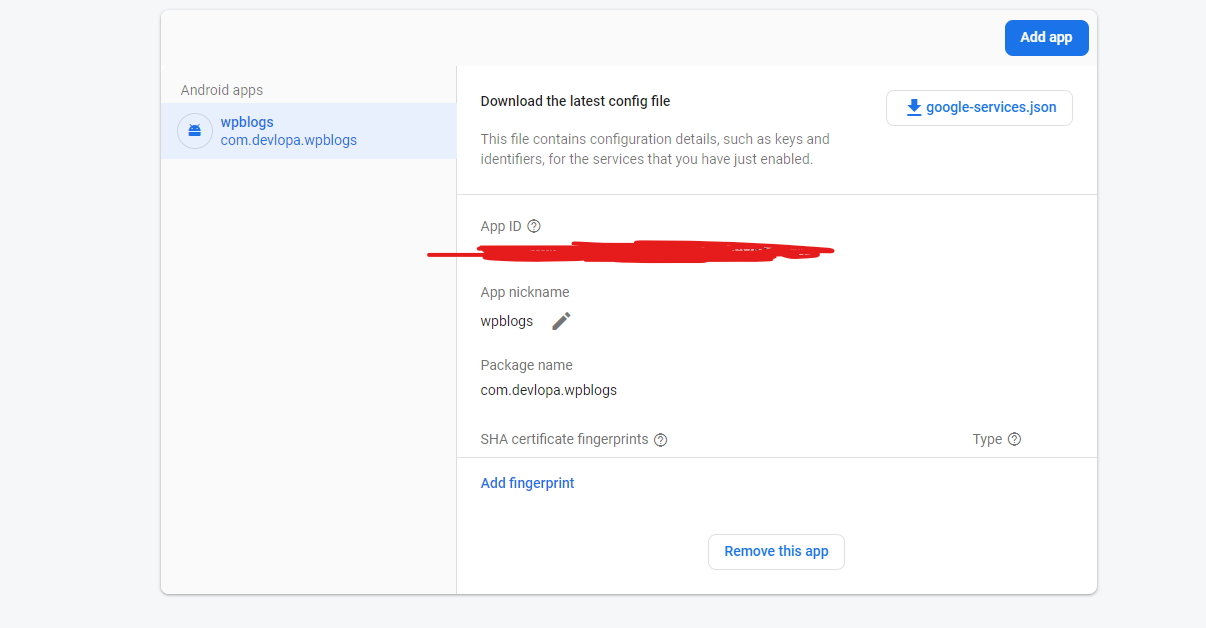
2. go to firebase app, then the general section in settings
3.if you already linked your android app with firebase by providing the android package name you can simply
click the google-services.json download button in the above image, if no you can click add app and provide
your package name then download the google-services.json, keep thats file somewhere we will need it later .
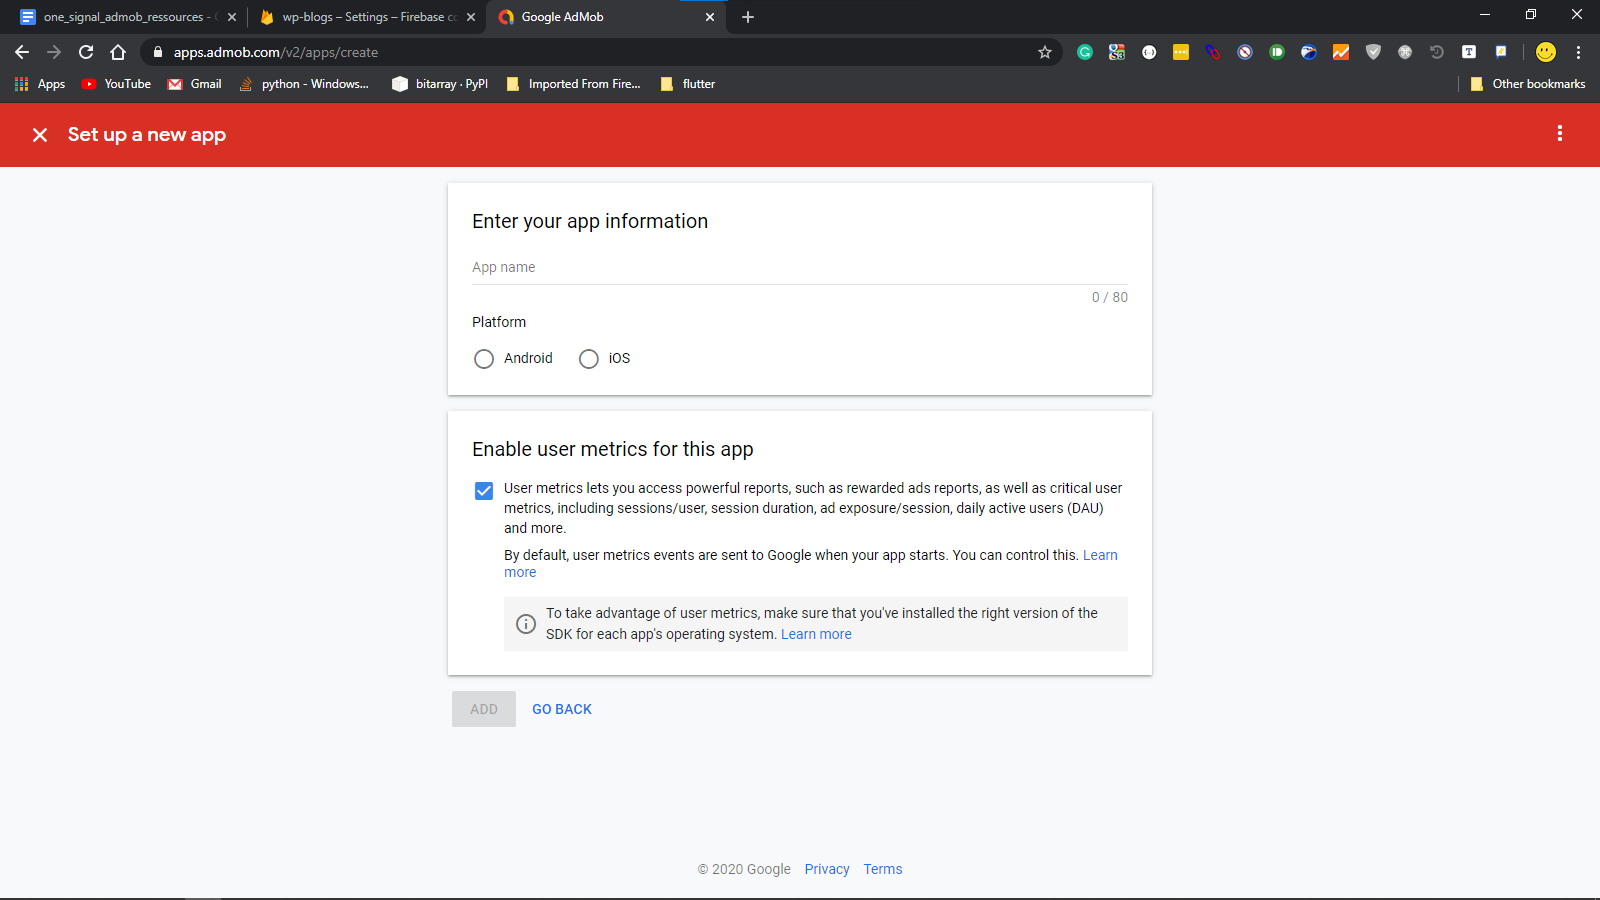
4.now we have done from the firebase part, time to set up AdMob account and units, if you have AdSense account
great, make sure its use same email address as firebase , if you don't have one you can create new one it's
pretty easy, assuming you have the AdMob account ready. create new AdMob app and give it a name and select
android
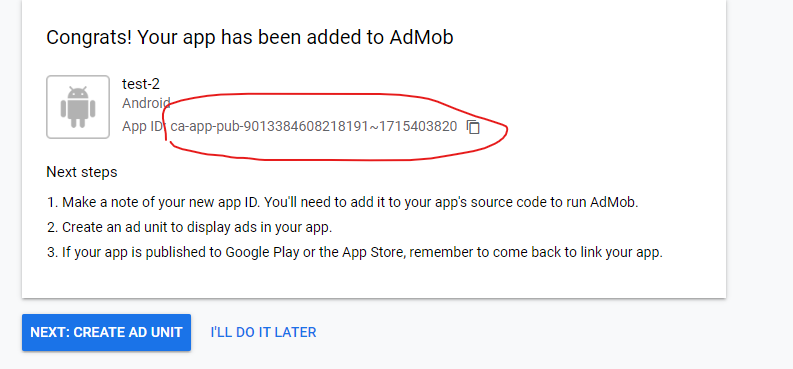
5.if all the above steps are correct you should see a page like this, copy thats app-id we will need later
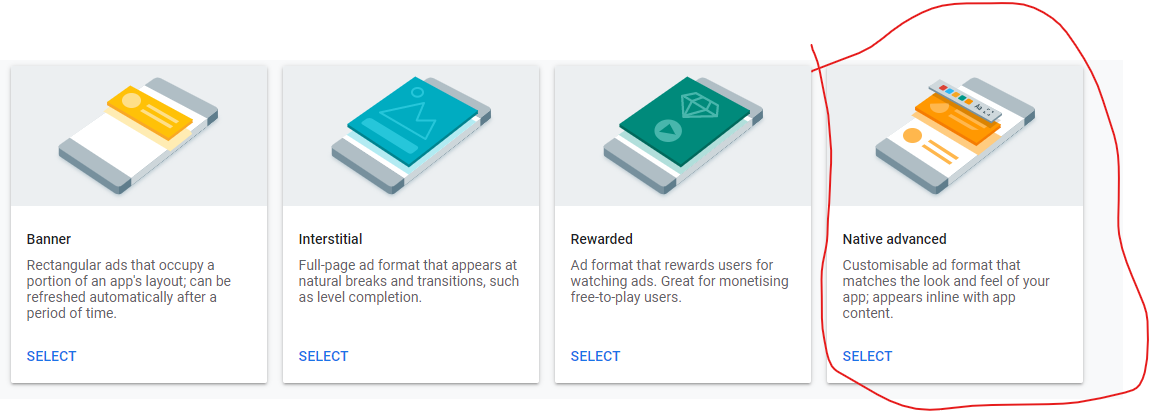
5.now its time to create ads units ,select native Advanced
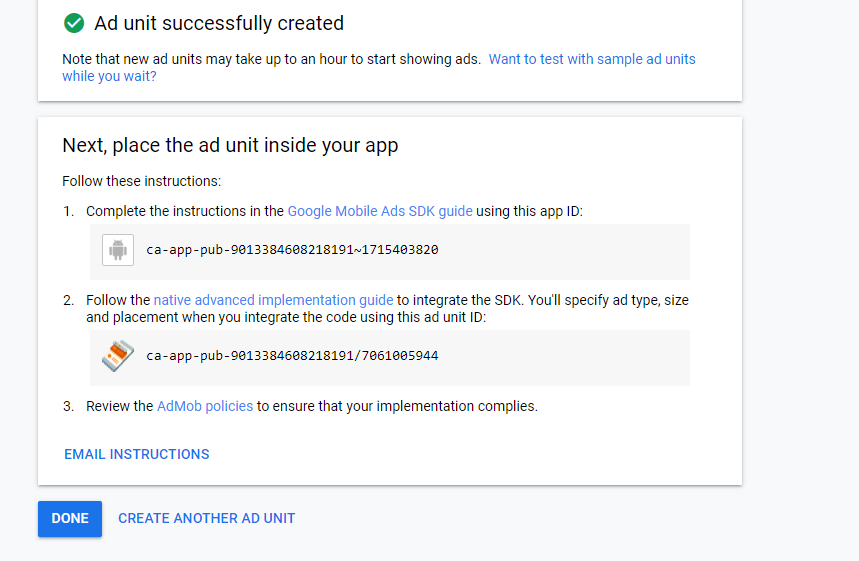
6.create two ads native ads units with different names
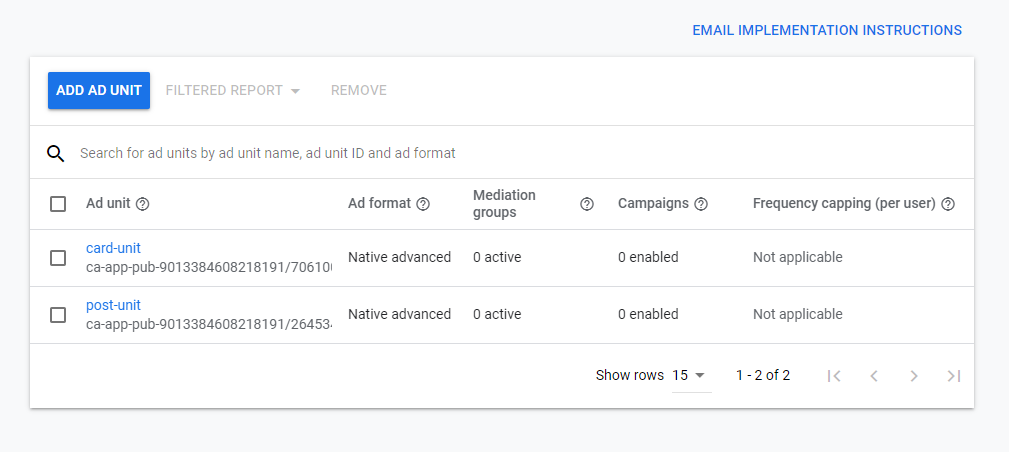
7.after you create both ads units its should look like this in the dashboard, save both units ids we will need
them later to activate AdMob in the app
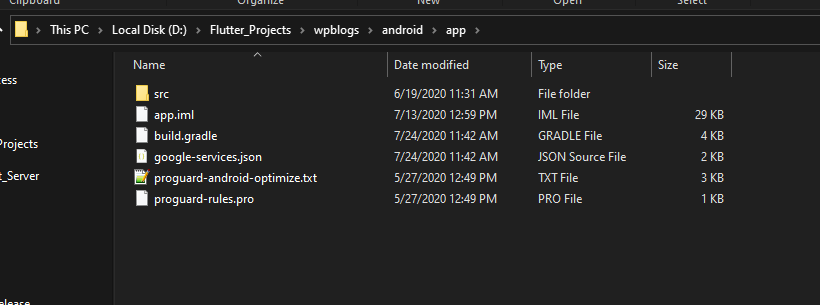
9. add the google-services.json file you previously downloaded to this path wpblogs/android/app
10.if all the steps followed correctly the AdMob ads should now be working on your app after a fresh build of
the apk , (ads will not show after the first run unless you are using an emulator ), its may take while until
they start showing,
Theme Guide and App config
Change Cover App
Steps
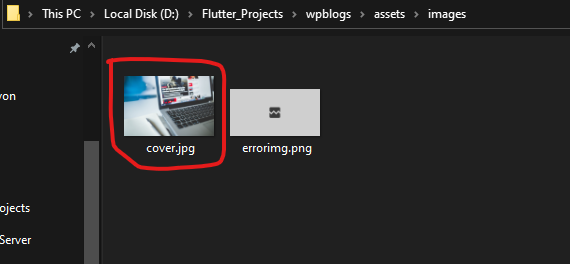
1.For changing cover image go to this directory
wpblogs/assets/images and replace
cover.jpg with your image cover be sure to be the exact name
2.After changing the image make sure to rebuild your app to apply
the changes
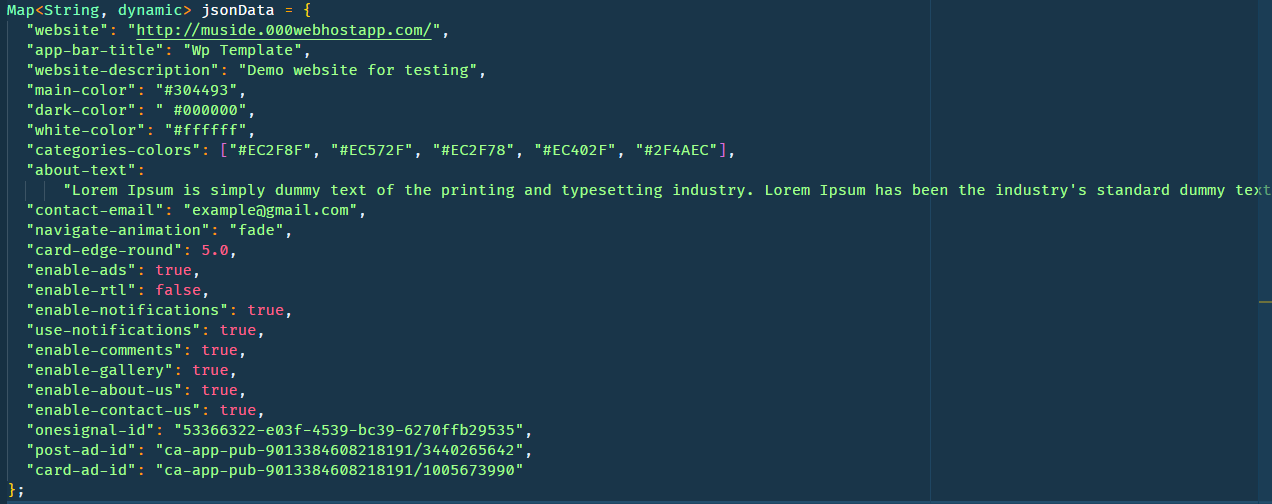
2.Make sure to have correct formatting of the json file when editing
or addding new values
3.After changing any value on the file make sure to save it and
rebuild your application .
4.Some fields on the json file need specific inputs or a specific
type of data .
● website : A string value represent
your wordpress website
● app-bar-title : A string value
contains title of your app
● website-description : String value
contains short description of the app
● main-color : A string of hex color
represent the main color of the app
● dark-color : A string of hex color
represent the dark color of the app we set it as black color you
can change to any darker color you want, but better keep as black
color to go with the dark mode
● white-color : A string color
represent the normal white color of the app its set by default as
white color to go with app theme
● categories-colors : List of Strings
of hex colors represent Colors of categories in the app you can
add as many as you want on the list or just one and the app will
take a random color for each category and set it each time you
access categories page
● about-text : String value for about
us section on the app
● contact-email : String value for the
email address for using in the contact us section in the app
● error-img : A string value of URL of
an image to use instead of default image coming from WordPress API
when an error happens in image load you can keep as default or
change it to hosted just make sure is a direct link
● navigate-animation : A string value
from preset of a list of values represent the type of animation
when navigating from page to other here list of all the supported
animation, you simply take the value and replace it in the field
upToDown
downToUp
rightToLeftWithFade
leftToRightWithFade
fade
rightToLeft
leftToRight
rotate
● enable-comments : Boolean value
represent if comments is enabled or disabled in the app
● enable-notifications : Boolean value to set the status of notifications if
enabled or disabled par default
● use-notifications : Boolean value to enable or disable the notification on the
app if you don't wanna use notifications your app you simply can set it to false and ignore the one signal
setup
● enable-gallery : Boolean value
represent if Gallery page is enabled or disabled in the app
● card-edge-round : A double value
represents the round value on the edge of the card of the posts in
the app
● enable-ads : A Boolean value
to enable or disable ads from showing on the app
● enable-rtl : A Boolean value
to enable or disable right to left language layout
● enable-about-us : Boolean value
represent if about us section is enabled or disabled in the app
●enable-contact-us : Boolean value
represent if contact us section is enabled or disabled in the app
● onesignal-id : OneSignal app id with it your app will receive notification
from
your website make sure to use the right one you can find it either on WordPress dashboard if you already set
up it or your app in OneSignal website
● post-ad-id : the native Admob unit id thats will be using on the page where
users read the articles
● card-ad-id : the native Admob unit id thats will be using on the posts cards,
thats are showing on the home page
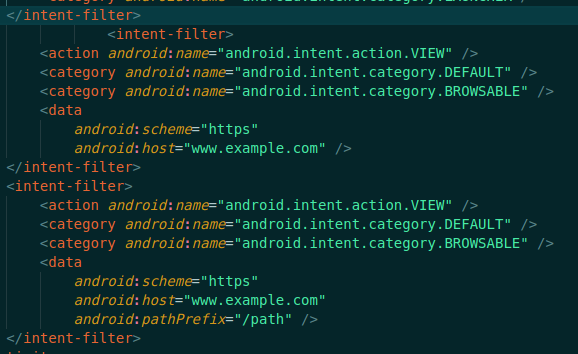
Setup Deep linking
Deep linking in our app allows when they are post link shared on a
social media app or any others when clicked you can open the post
directly on the application
Open the file on this path
wpblogs/android/app/src/main/AndroidManifest.xml
and scroll until you find android:host field there you can replace
the example website with the domain of your website make sure they
are no extra characters only the domain they are 2 fields so make
sure to replace them both
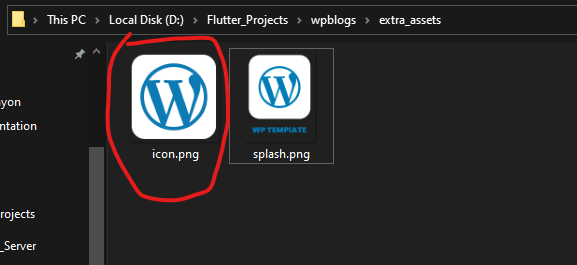
For changing Launcher icon we use a command-line tool to help with
thats Until not have to edit any internal files in the android
directory, you simply Have to provide icon.png file to the folder
with 512*512 dimensions and the tool Will take care of the rest
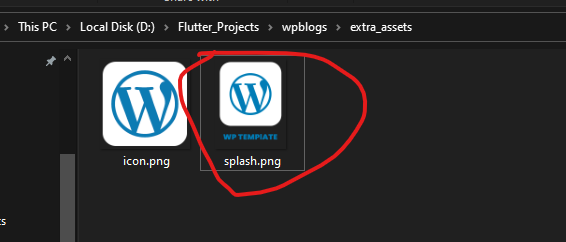
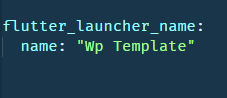
For changing the splash screen we same as before command-line tool
to thats And config file to configure it, this easy to set up
without doing any complicated Configurations simply add the png file
to the folder with the exact name as showing in The image, and for
the color open this file flutter_native_splash.yaml and set the
color you want in the color section and save
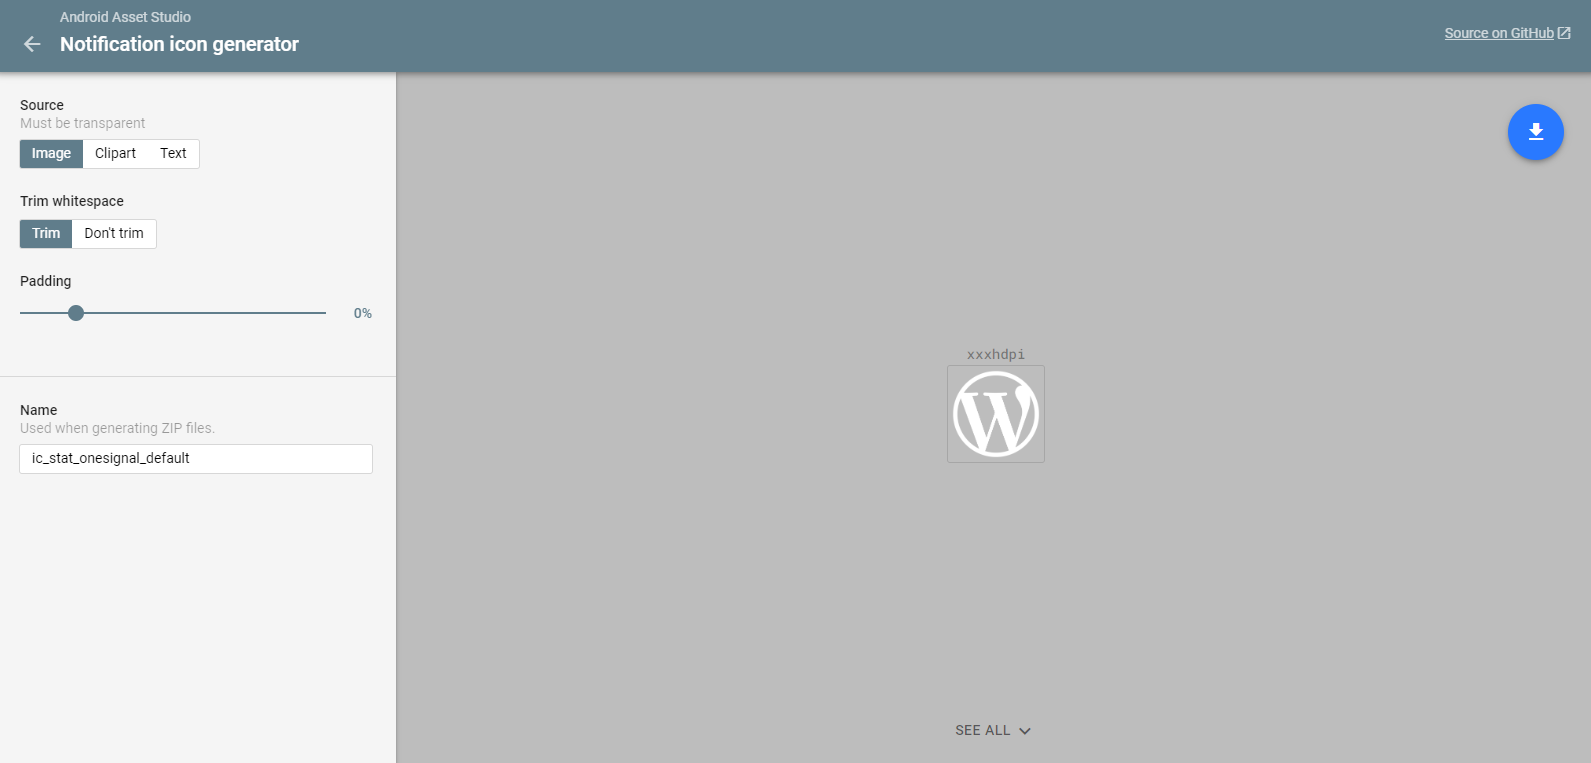
1. to setup notification icon you need to have an icon with a transparent background then upload it to this
website
, its make it easy for you instead of creating different sizes of the icon manually
2. select the image section and upload your file then download from the button on the right corner
3. after you download the zip file you have to unzip it and on each folder, you have to copy the file to the
folder with the same name in the res directory wpblogs/android/app/src/main/res